A two-way switch, sometimes called a double-pole switch, lets you control a single light from two different spots. You often find a two-way switch in staircases or rooms with two doors.
You can turn a light on or off whether you enter or leave a space.
Here are some reasons you might use a two-way switch:
-
You want to control the same light from upstairs and downstairs.
-
You need easy lighting access from either end of a hallway.
-
You want more convenience in busy areas.
If you plan to try Two-Way Switch Wiring at home, remember to keep safety first and follow clear steps.
Key Takeaways
-
A two-way switch lets you turn a light on or off from two places. This makes things easier and safer in spots like stairs and hallways.
-
Modern two-way switch wiring uses three wires for more safety and better working. Always use the right wire colors and follow safety rules when you install it.
-
When you put in a two-way switch, turn off the main power first. Use a voltage tester to make sure it is safe before you start.
-
Two-way switches help save energy. You can turn off lights from more than one place. This helps stop people from leaving lights on by mistake.
-
If you have trouble with wiring or installing, ask a licensed electrician for help. This keeps you safe and makes sure you follow local rules.
Two-Way Switch Overview
What Is a Two-Way Switch
A two-way switch lets you control one light or device from two different places. You often see a two-way switch in homes, hotels, and large rooms. When you use a two-way switch, you can turn a light on or off from either end of a hallway or staircase. This makes moving around your home safer and more convenient. You do not have to walk back to the first switch to turn off the light.
You will find a two-way switch in many places, such as:
-
Staircases, where you want to control the light from both the top and bottom.
-
Hotel rooms, so you can turn off the lights from the door or the bed.
-
Open-plan homes, which have large spaces with more than one entrance.
-
Garages and workshops, where you need light control from different doors.
-
Outdoor paths and driveways, to help you see better at night.
Key Features
A two-way switch has special features that make it different from a regular switch. You will notice that a two-way switch has three terminals. This allows two switches to work together to control the same light. The wiring is a bit more complex, but you get more control.
| Feature | Two-Way Switch | One-Way Switch |
|---|---|---|
| Control | Two switches control the same light | One switch controls the light |
| Wiring Complexity | Slightly more complex wiring with three terminals | Simpler wiring with two terminals |
| Functionality | Allows control from two different locations | Control from a single location |
You can use a two-way switch to make your home smarter and safer. You do not need to walk in the dark to find a switch.
Two-Way vs One-Way Switch
You might wonder how a two-way switch is different from a one-way switch. The main difference is the number of places you can control the light from. A one-way switch only lets you turn a light on or off from one spot. A two-way switch lets you do this from two spots.
| Feature | One-Way Switch | Two-Way Switch |
|---|---|---|
| Control Location | Single location | Two different locations |
| Number of Terminals | Two terminals | Three terminals |
| Wiring Complexity | Simple wiring | More complex wiring |
| Use Case | Basic lighting control | Convenient control in larger spaces |
Tip: If you want to make your home more comfortable, use a two-way switch in busy or large areas.
How a Two-Way Switch Works
Switching Mechanism
When you use a two-way switch, you control a light from two different places. Each switch in this setup has three terminals: COM (Common), L1, and L2. The switching mechanism works by changing which terminal connects to the common terminal. If you flip the switch, the COM terminal connects to either L1 or L2. This action changes the path of the electrical current.
You can think of the two-way switch as a traffic director for electricity. When you flip either switch, you change the direction of the current. This lets you turn the light on or off from either location. The two-way switch uses a Single Pole Double Throw (SPDT) design. This means each switch can send the current down one of two paths. You get more control over your lighting with this simple mechanism.
Tip: If you want to check how your two-way switch works, listen for a click when you flip it. That sound means the internal contacts have changed position.
Electrical Pathways
The electrical pathways in a two-way switch system allow you to control a single light from two spots. When you wire two switches together, you create two possible routes for the current to travel. The COM terminal acts as the entry point for the current. L1 and L2 serve as the exit points. Depending on the position of each switch, the current will flow through one path or the other.
Here is how the pathway changes:
-
Each switch has three terminals: COM, L1, and L2.
-
When you flip a switch, the COM terminal connects to either L1 or L2.
-
This connection changes the circuit, so the light turns on or off from either switch.
A two-way switch setup lets you break or complete the circuit from both locations. You do not need to walk back to the first switch to turn off the light. This makes your home safer and more convenient, especially in places like hallways or staircases.
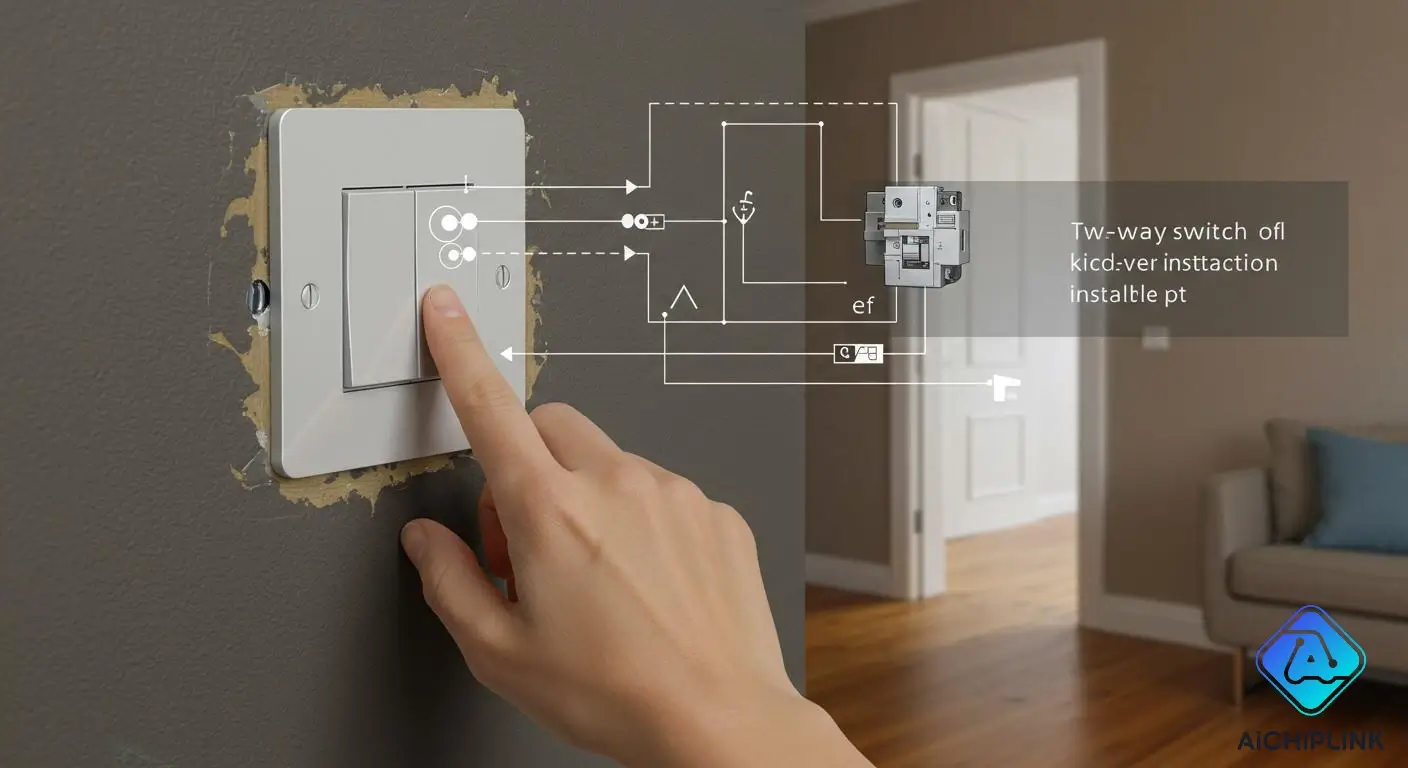
Two-Way Switch Wiring
Modern Wiring Method
Modern two-way switch wiring uses three wires. This way is now common in North America and Europe. It helps keep you safe and makes fixing problems easier. The live wire connects to the common terminal on the first switch. Two traveler wires link the L1 and L2 terminals on both switches. The common terminal on the second switch connects to the light’s live input. The neutral wire from the light goes straight to the power source’s neutral.
Here is a table that shows the main features of modern and legacy wiring methods:
| Method | Description |
|---|---|
| Modern 3-Wire | Preferred for new installations; connects live wire to common terminal, ensuring consistent voltage. |
| Legacy 2-Wire | Older method; may introduce safety risks due to different circuit connections for power and load. |
Modern two-way switch wiring uses brown for live wires and blue for neutral wires. Always use the latest color codes to stay safe.
Tip: Modern wiring often has Residual Current Devices (RCDs). These devices help protect you from electrical problems and keep your home safe.
Legacy Wiring Method
Legacy two-way switch wiring uses only two wires. You might see this in older homes. This setup sometimes borrows wires from other switches, which can be unsafe. The color codes in old systems may not match today’s rules. For example, black was used for live wires on L1, but now brown is the standard.
Here is a table that compares key aspects of legacy and modern wiring methods:
| Aspect | Legacy Method | Modern Method |
|---|---|---|
| Circuit Design | Typically a single circuit for lighting, with limited safety considerations. | Incorporates RCDs for enhanced safety, preventing total power loss during faults. |
| Wiring Practices | Often used borrowed lines from adjacent switches, which could cause issues. | Uses dedicated wiring methods that maintain circuit separation and reduce interference risks. |
| Color Coding | Black often used for live on L1, which may not align with current standards. | Brown is now commonly used for live, aligning with modern color coding standards. |
| Safety Considerations | Minimal awareness of potential hazards, such as interference with hearing aids. | Increased awareness of safety, with practices evolving to mitigate risks associated with older methods. |
You should upgrade old two-way switch wiring if you can. Modern wiring gives you better safety and follows new rules.
Step-by-Step Guide
You can wire a two-way switch using the modern method by following these steps. Always turn off the main power before you start. Use a voltage tester to make sure the wires are not live.
-
Gather all tools and materials. You need two SPDT switches, wire strippers, a screwdriver, a multimeter, and the right wires.
-
Turn off the main power at the circuit breaker. Check again to make sure the power is off.
-
Connect the live wire to the common terminal (COM) of the first switch.
-
Run two traveler wires between the L1 and L2 terminals of both switches.
-
Connect the common terminal (COM) of the second switch to the light’s live input.
-
Connect the light’s neutral wire straight to the power source’s neutral.
-
Ground all metal boxes and switch covers using the earth wire.
-
Use a multimeter to check for continuity before turning the power back on.
-
Test the switches from both places to make sure they work.
-
Double-check traveler wire connections if the light does not work.
SPDT switches are important in two-way switch wiring. These switches let you control one light from two places. Each switch has a common terminal and two traveler terminals. The common terminal connects to the power or the light. The traveler terminals link the two switches together. This setup gives you flexible control over your lights.
Note: Always match wire colors to the right terminals. For example, connect the black or brown power wire to the common terminal. Use the same color for traveler wires on both switches.
Safety Precautions
You must follow safety rules when working with two-way switch wiring. Incorrect live and neutral connections can cause serious problems:
-
Electrical fires may start if you wire the switches wrong.
-
Equipment damage can happen if you mix up the wires.
-
You risk electrocution if you reverse live and neutral wires.
-
Sparking or flickering lights may warn you of a problem.
-
A burning smell means you should stop and check your wiring.
Here is a table of common mistakes and how to avoid them:
| Mistake | Explanation |
|---|---|
| Misidentifying wire colors | Mixing up wire colors can cause dangerous mistakes, like bad connections that may lead to electrical failures or fires. |
| Selecting the wrong wire type | Using a wire not made for the job can cause overheating and fire. Always check wire ratings. |
| Incorrect wire sizing | Wires that are too small can overheat, while big wires can be hard to use. Knowing wire gauge is important. |
| Improper wire connections | Using the wrong connectors or not securing wires can cause loose connections, which often lead to failures and fires. |
| Not understanding electrical load | Putting too much load on circuits can trip breakers and overheat wires, which may cause fires. Always check load limits. |
Alert: If you feel unsure about any step in two-way switch wiring, call a licensed electrician. Your safety is most important.
Types of Two-Way Switches
When you look for a two-way switch, you will find several types. Each type has its own design and features. You can choose the one that fits your needs and style. A two-way switch lets you control a single light or ceiling fan from two different places. This feature helps you turn the light on or off from either end of a hallway or room. It makes your home safer and more convenient, especially in spaces with two entryways.
Toggle
A toggle two-way switch is the most common type you will see in homes. You flip a small lever up or down to turn the light on or off. The toggle design is simple and easy to use. You can feel the switch move into place, which gives you a clear sign that the light has changed. Many people like toggle switches because they are reliable and last a long time. You can find them in many colors and finishes to match your room.
Tip: If you want a classic look, choose a toggle two-way switch. It works well in most homes and is easy to replace.
Rocker
A rocker two-way switch has a flat, wide surface that rocks back and forth. You press one side to turn the light on and the other side to turn it off. Rocker switches look modern and are easy to clean. You might find them easier to use if you have trouble gripping small objects. Many new homes use rocker switches because they look sleek and fit well with modern decor.
-
Rocker two-way switches are good for people who want a smooth, modern style.
-
You can install them in the same way as toggle switches.
Smart
Smart two-way switches give you more control over your lights. You can use an app or a voice assistant to turn the light on or off. Some smart switches let you set schedules or connect to other smart home devices. You may need a neutral wire for some smart switches, but others work wirelessly.
Here is a table that shows how smart switches compare to traditional switches:
| Feature | Smart Switches | Traditional Switches |
|---|---|---|
| Control Method | Remote control via app or voice assistant | Manual operation |
| Scheduling | Yes, programmable schedules available | No |
| Home Automation Integration | Yes, integrates with smart home systems | No |
| Wiring Requirements | Often requires a neutral wire | Simpler installation, no neutral wire |
| Energy Savings | Can reduce energy consumption through remote control | No |
Note: Smart two-way switches can help you save energy and make your home smarter. You can control your lights even when you are not at home.
Expanding Two-Way Switching
Adding a Third Switch
Sometimes, you want to control a light from three places. For example, you may want to turn on a hallway light from three doors. You can do this by adding a third switch to your two-way switch setup. This is called three-way or multi-way switching. You need a special switch called an intermediate switch. It has four terminals and goes between the two-way switches.
When you add a third switch, you must use more wires. The wiring gets harder, but you get more control. Always look at your wiring plan before you start. Make sure your switch boxes have enough room for extra wires.
To add another switch and lamp, you need always-hot and neutral wires. The current in each cable must be the same. You cannot take power from one cable and return it on a different cable.
If you follow these rules, you can safely add more switches. Always turn off the power before you touch any wires.
Multi-Way Overview
Multi-way switching lets you control one light from three or more spots. You use both two-way switches and intermediate switches. This setup is good for big rooms, long hallways, or stairs with many doors. Multi-way switching gives you more choices and keeps you safer.
You might have some problems when you add more switches. The table below shows common issues:
| Challenge | Description |
|---|---|
| Needs More Wiring | Multi-way setups need extra wires. Older homes may not have enough space in the boxes. This can make the job cost more and take longer. |
| Not Always Good with Smart Switches | Many smart switches need a neutral wire. Old homes may not have this, so you may need to rewire to use smart switches. |
| Can Be Hard in Old or Custom Homes | Old or custom wiring may not follow today’s rules. This makes adding or changing switches harder. |
| Different Rules in Different Places | Electrical codes are not the same everywhere. What works in one place may not be allowed in another, especially in businesses or when selling a house. |
If you want to upgrade to a multi-way system, check your local electrical rules. You may need an electrician for hard jobs. Multi-way switching gives you more ways to control lights, but you must plan and wire it safely.
Applications
Staircases
Staircases need light at both the top and bottom. A two-way switch helps you do this. You can turn the light on before going upstairs. You can turn it off when you reach the top. This keeps you safe because you do not walk in the dark. You also save energy by turning off the light from either end. Many homes use two-way switches on stairs for safety and ease.
Hallways
A two-way switch is great for hallways. You can control the light from both ends. This makes your home safer, especially at night. Here are ways a two-way switch helps in hallways: You can turn the light on when you enter. You can turn it off when you leave. You do not need to walk back to the first switch. You save energy by not leaving lights on. The hallway stays bright, which helps stop accidents.
Tip: Put a two-way switch in long hallways. It makes your home safer and saves energy.
Large Rooms
Large rooms often have more than one door. A two-way switch lets you control lights from different spots. This makes it easy to turn lights on or off anywhere in the room. You save energy because you do not leave lights on when you exit from another door. The table below shows why two-way switches are better than single switches in big rooms:
| Advantage | Description |
|---|---|
| Convenient Lighting Control | You can control lights from many places. This makes large rooms easier to use. |
| Energy Saving | You waste less electricity by turning off lights from different spots. |
| Ideal for Large Spaces | Good for rooms with many doors. This helps keep people safe and makes moving around easier. |
Industrial Uses
Factories and warehouses use two-way switches for safety and work speed. Workers can control machines and lights from different places. This helps stop accidents and keeps work going well. Here are some common uses in factories:
| Application Area | Benefits |
|---|---|
| Packaging Machines | Keeps workers safe and stops machine damage |
| Conveyor Systems | Makes work faster and cuts down on waiting |
| Material Handling Equipment | Helps machines work well and safely |
| Robotics | Makes robot moves more exact |
| CNC Machines | Gives better control for good results |
A two-way switch is important in many work areas. It helps make jobs safer and helps people work better.
Installation
Tools Needed
You need the right tools and materials for a safe and successful installation. Gather everything before you start working with a two-way switch. Here is a checklist to help you prepare:
-
Two SPDT (Single Pole Double Throw) switches
-
Light fixture
-
Three-core cable (live, neutral, earth, and two traveler wires)
-
Screwdriver (flathead and Phillips)
-
Wire strippers
-
Wire nuts
-
Voltage tester
-
Junction boxes
-
Electrical wire (3-conductor cable)
-
Insulated gloves
-
Safety glasses
-
1.5 mm² double insulated copper cables for industrial use
-
1.0 mm² double insulated copper cables for homes
-
2.5 mm² single insulated copper cables for earth connections
Tip: Always use insulated gloves and safety glasses during installation. This protects you from electric shocks and flying debris.
Safety Tips
Safety comes first when you work on any electrical installation. You must follow these steps to avoid accidents and keep your home safe:
-
Gather all tools and materials before you begin. Make sure you have SPDT switches, a light fixture, and safety gear.
-
Turn off the main power at the circuit breaker. This step prevents you from working with live wires.
-
Ground all metal boxes and switch covers. This protects you from electrical faults and shocks.
-
Use a multimeter to check for continuity before you restore power. This step helps you find wiring errors that could cause hazards.
⚠️ Never skip safety checks. If you feel unsure about any part of the installation, ask a licensed electrician for help.
Installation Steps
You can install a two-way switch by following these clear steps. Take your time and check each connection as you go.
-
Turn off the power to the circuit at the main breaker panel. Use a voltage tester to make sure no electricity flows through the wires.
-
Identify the wires in your setup. You will see black (hot), white (neutral), and sometimes green or bare (ground).
-
Remove the old switch. Unscrew the switch plate and gently pull the switch out of the box.
-
Connect the hot wire from the power source to the common terminal on the first two-way switch.
-
Run two traveler wires between the L1 and L2 terminals of both switches.
-
Connect the common terminal of the second switch to the light fixture’s live input.
-
Join the neutral wires together with a wire nut. The neutral wire should run directly from the power source to the light.
-
Attach the ground wire to the green or bare terminal on the switch and the metal box.
-
Tuck the wires neatly into the box. Secure the switch with screws.
-
Place the switch plate over the switch and fasten it.
-
Restore power at the breaker panel. Test the two-way switch from both locations to make sure the light turns on and off.
-
Use electrical tape or wire connectors to secure all wire connections inside the box.
Note: Always double-check traveler wire connections. If the light does not work, check each wire for tightness and correct placement.
Testing and Troubleshooting
After installation, you need to test the two-way switch and fix any problems. Follow these steps to make sure everything works:
-
Use a multimeter to check for continuity before you turn the power back on.
-
Test both switches. Flip each switch to see if the light turns on and off from both locations.
-
If the light does not work, double-check the traveler wire connections.
-
Switch off the power supply if you need to fix anything.
-
Locate both switches and identify all wires.
-
Check shuttle wire connections and make sure they are secure.
-
Check the phase and lamp return wires.
-
Test the operation after you reassemble the switches and cover plates.
? If you notice flickering lights or the switch does not work, check for loose wires or incorrect connections. Always switch off the power before making repairs.
A careful installation and thorough testing help you enjoy safe and reliable lighting control with your two-way switch.
Benefits and Limitations
Advantages
A two-way switch gives you many helpful features at home or work. You can turn lights on or off from more than one spot. This makes life easier every day. If you have a long hallway or stairs, you do not need to walk back to the first switch. You save time and do not waste effort.
You also save energy with a two-way switch. You can turn off lights from any place, so you do not forget and leave them on. This helps you use less electricity and pay lower bills. Your home is safer because you do not walk in the dark to find a switch. You get more choices for your lights, which is good in busy or big rooms.
Tip: Put a two-way switch where you need to control lights from different places. This makes your home safer and more comfortable.
Drawbacks
A two-way switch has some problems you should know about. You might have trouble when you install or upgrade it. The table below lists common problems you may see:
| Limitation | Description |
|---|---|
| Requires More Wiring | Two-way switches need extra wires. This can make installation harder in old homes. |
| Not Always Compatible with Smart Switches | Many smart switches need a neutral wire. Old setups may not have this, so upgrades can be tricky. |
| Can Be Tricky in Older or Custom Installations | Old buildings may not use modern layouts. This makes installation harder. |
| Regional Code Differences | Electrical rules are different in each place. This can make installation and checks more complex. |
| Troubleshooting Takes More Time | Fixing problems in two-way systems takes longer. Both switches work together, so it is more complicated. |
| Needs Careful Planning and Labeling | You must plan and label wires carefully. This helps you avoid mistakes when you install the switch. |
You need to plan and label wires when you use a two-way switch. If your home has old wiring, you may have more problems. Always check local electrical rules before you start. If you are not sure, ask an expert for help.
A two-way switch lets you control lights from more than one place. This is helpful in homes and factories. It makes stairs and hallways safer and easier to use. Look at the table below for important points:
| Benefits of Two-Way Switches | Limitations of Two-Way Switches |
|---|---|
| Works with Smart Systems | Needs extra wires |
| Low Cost, High Value | May not work with all smart switches |
| Harder to install in old or special buildings | |
| Rules can be different in each area | |
| Fixing problems can take longer | |
| You must plan and label wires |
Always use safety steps when you put in a two-way switch. Ask an expert if you are not sure what to do. Write down and label your setup so you can fix it later. Try other projects to get the best use from your two-way switch.

Written by Jack Elliott from AIChipLink.
AIChipLink, one of the fastest-growing global independent electronic components distributors in the world, offers millions of products from thousands of manufacturers, and many of our in-stock parts is available to ship same day.
We mainly source and distribute integrated circuit (IC) products of brands such as Broadcom, Microchip, Texas Instruments, Infineon, NXP, Analog Devices, Qualcomm, Intel, etc., which are widely used in communication & network, telecom, industrial control, new energy and automotive electronics.
Empowered by AI, Linked to the Future. Get started on AIChipLink.com and submit your RFQ online today!
Frequently Asked Questions
What is the main purpose of a two-way switch?
You use a two-way switch to control one light or device from two different places. This setup helps you turn lights on or off from either end of a hallway or staircase.
Can you install a two-way switch in an old house?
Yes, you can install a two-way switch in an old house. You may need to update the wiring to meet modern safety standards. Always check the existing wires before you start your project.
Do you need special tools to wire a two-way switch?
You need basic electrical tools like a screwdriver, wire strippers, and a voltage tester. A two-way switch does not require advanced tools. Always use insulated gloves and safety glasses for protection.
How do you know if a two-way switch is wired correctly?
You should test both switches. If you can turn the light on or off from either switch, your two-way switch works correctly. If the light does not respond, check your wire connections.
Can a two-way switch work with smart home systems?
Many smart home systems support a two-way switch. Some smart switches need a neutral wire. Check your wiring and the smart switch instructions before you install anything.