Table of Contents
- 1.0 What is the STM32 Nucleo-64? More Than Just a Microcontroller Board
- 2.0 Key Features: The Nucleo-64 Advantage
- 3.0 Getting Started with Your STM32 Nucleo-64
- 4.0 STM32 Nucleo-64 vs. Arduino Uno: Which Should You Choose?
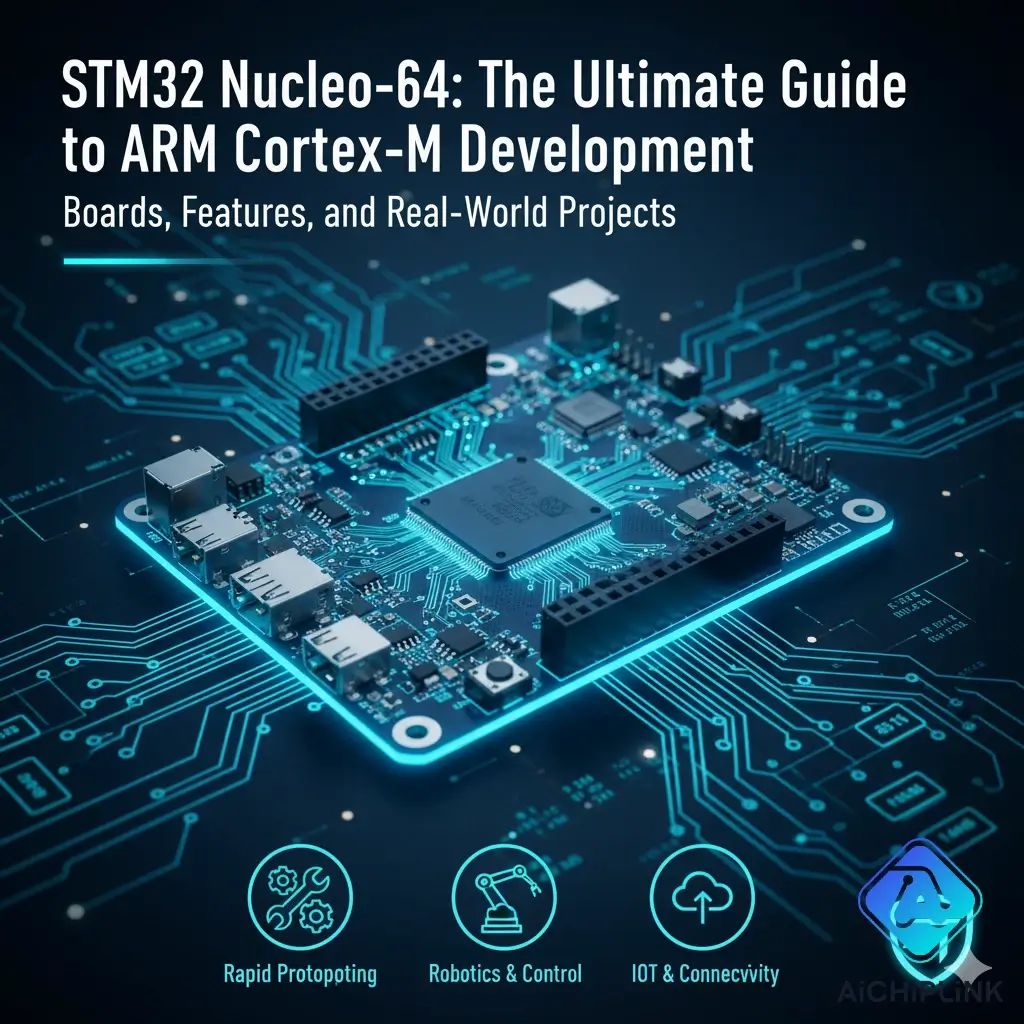
If you've mastered the basics on an 8-bit Arduino and are ready to tackle more complex projects, the world of 32-bit microcontrollers can seem intimidating. Historically, professional 32-bit embedded development required expensive tools and a steep learning curve. But that has completely changed with the introduction of affordable and powerful development platforms. Leading the charge is the STM32 Nucleo-64 family from STMicroelectronics.
The Nucleo-64 is more than just a development board; it's a complete ecosystem designed to bridge the gap between hobbyist tinkering and professional prototyping. It puts a powerful 32-bit ARM Cortex-M processor at your fingertips, surrounded by features that make it incredibly easy to use. This guide will introduce you to the Nucleo-64 platform, show you how to get started, and compare it directly to the familiar Arduino Uno.
1.0 What is the STM32 Nucleo-64? More Than Just a Microcontroller Board
The STM32 Nucleo-64 is a series of development boards designed by STMicroelectronics to showcase their vast range of STM32 microcontrollers. Each board is an affordable, all-in-one package that provides everything you need to start programming and prototyping with a specific 32-bit ARM-based MCU.
1.1 The Core: A Powerful 32-bit ARM Cortex-M MCU
At the heart of every Nucleo-64 board is a 64-pin STM32 microcontroller. These MCUs are based on the industry-standard ARM Cortex-M architecture, which dominates the embedded systems world. This means they offer:
- High Performance: 32-bit processing is significantly faster and more powerful than the 8-bit MCUs on basic Arduinos.
- Advanced Peripherals: More timers, higher resolution ADCs, and advanced communication interfaces like CAN, USB, and SDIO.
- More Memory: Significantly more Flash and RAM to handle complex applications.
1.2 The Nucleo-64 Family: A Board for Every Need (F1, F4, L4, etc.)
The "Nucleo-64" name refers to the board's form factor and the 64-pin MCU it carries. The family is vast, with each board named after the specific MCU it holds.
| Series | Key Feature | Example Board |
|---|---|---|
| STM32F4 | High Performance (DSP instructions, FPU) | NUCLEO-F446RE |
| STM32L4 | Ultra-Low Power Consumption | NUCLEO-L476RG |
| STM32F1 | Mainstream, Cost-Effective | NUCLEO-F103RB |
| STM32G0 | Mainstream, Next Generation | NUCLEO-G071RB |
2.0 Key Features: The Nucleo-64 Advantage
What makes the Nucleo-64 platform so popular is not just the powerful MCU, but the thoughtful design of the board itself.
2.1 Integrated ST-LINK/V2-1 Debugger/Programmer
This is the Nucleo's killer feature. The top section of every board is a built-in programmer and debugger called an ST-LINK.
- No External Tools Needed: You don't need to buy a separate, expensive programmer. Just plug the board into your PC with a USB cable.
- Hardware Debugging: This is a game-changer. You can pause your code while it's running on the chip, inspect variables, and step through lines one at a time. This makes finding bugs infinitely easier than using
Serial.print().
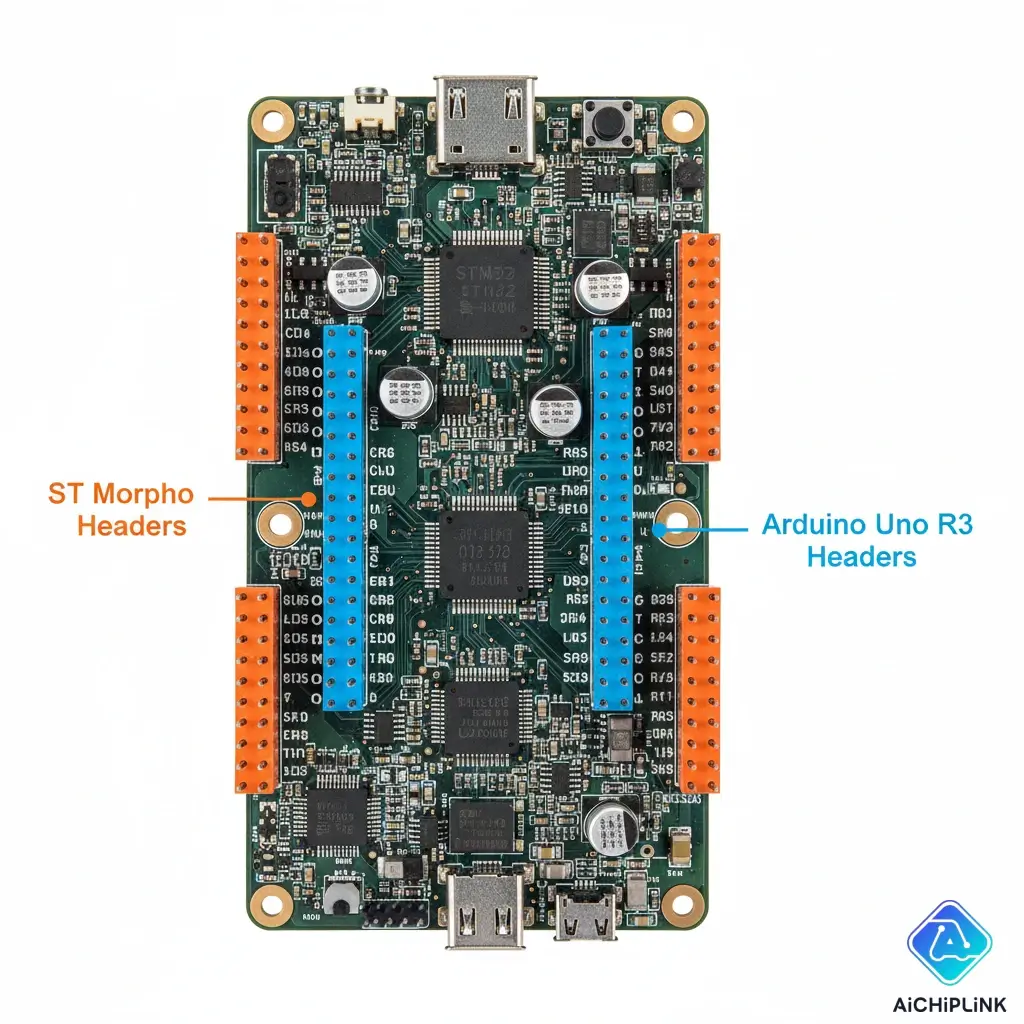
2.2 Flexible Pin Headers: Arduino Uno R3 and ST Morpho
The Nucleo-64 board has two sets of headers for maximum flexibility:
- Arduino Uno R3 Headers: The inner set of female headers are physically and electrically compatible with the vast ecosystem of Arduino shields.
- ST Morpho Headers: The outer two rows of male pins break out all of the MCU's pins, giving you full access to every feature of the chip.
2.3 Comprehensive Software Support: STM32CubeIDE
To program the boards, ST provides STM32CubeIDE, a free, professional-grade Integrated Development Environment. It combines a graphical pin configuration tool, a code generator, a C/C++ compiler, and a full-featured debugger in one package.
3.0 Getting Started with Your STM32 Nucleo-64
Let's run through a quick "Hello, World!" project: blinking the onboard LED.
3.1 What You'll Need
- An STM32 Nucleo-64 board (e.g., NUCLEO-F446RE)
- A USB Mini-B cable
- A computer with STM32CubeIDE installed
3.2 A Simple "Blinky" Tutorial with STM32CubeIDE
- New Project: In STM32CubeIDE, create a
New STM32 Project. Use theBoard Selectortab to find and select your specific Nucleo-64 model. - Initialize: Give your project a name and initialize the board with its default peripheral settings.
- Configure Pin: The graphical tool will show the MCU. The user LED (LD2) is usually on pin PA5. Click it and ensure it is set to
GPIO_Output. - Generate Code: Save the configuration. The IDE will automatically generate all the necessary initialization code.
- Write Code: Open the
main.cfile. Inside thewhile(1)loop in themainfunction, add these two lines:HAL_GPIO_TogglePin(LD2_GPIO_Port, LD2_Pin); HAL_Delay(500); // Delay 500 milliseconds - Build and Run
Connect your Nucleo board via USB.
Click the “Build” (hammer) icon, then the “Run” (green play button) icon.
The IDE will automatically program the board, and the green LED will start blinking!
3.3 Understanding the Nucleo-64 Pinout
The pinout can seem complex, but remember that many pins have multiple functions
(e.g., a pin can be a simple GPIO, an ADC input, or a PWM output).
The graphical configurator in STM32CubeIDE is the best tool for managing these pin functions.
4.0 STM32 Nucleo-64 vs. Arduino Uno: Which Should You Choose?
This is a common question for those looking to take the next step.
4.1 A Head-to-Head Specification Comparison
| Feature | Arduino Uno | STM32 Nucleo-64 (F446RE) |
|---|---|---|
| Architecture | 8-bit AVR | 32-bit ARM Cortex-M4 |
| Clock Speed | 16 MHz | 180 MHz |
| Flash Memory | 32 KB | 512 KB |
| RAM | 2 KB | 128 KB |
| ADC Resolution | 10-bit | 12-bit |
| On-Board Debugger | No | Yes (ST-LINK) |
| Cost | Low | Low |
4.2 When to Choose Arduino vs. When to Upgrade to Nucleo
Choose Arduino When:
- You are an absolute beginner.
- Your project is very simple.
- You want to leverage the massive library of beginner-focused tutorials and simple code examples.
Upgrade to Nucleo When:
- You need more processing power, memory, or peripherals.
- You require higher precision or advanced functionality.
- You are ready to learn the tools and techniques used in the professional embedded industry.
? “The Nucleo platform isn't just an Arduino alternative; it's a direct pathway into the professional ARM ecosystem. The skills you learn with CubeIDE and HAL libraries are directly applicable to industry jobs.”
Frequently Asked Questions
What is the difference between an STM32 Nucleo-64 and an Arduino?
The main difference is the microcontroller. An STM32 Nucleo-64 uses a powerful 32-bit ARM Cortex-M processor, which is significantly faster and has more memory and peripherals than the 8-bit AVR microcontroller on a standard Arduino Uno. The Nucleo also includes a built-in programmer and debugger.
Do I need a programmer for the Nucleo-64 board?
No. Every STM32 Nucleo-64 board has an integrated ST-LINK programmer and debugger. You can program and debug the main MCU simply by connecting the board to your computer with a USB cable.
What are Morpho headers on a Nucleo board?
The ST Morpho headers are the two long rows of male pins along the outside edges of the board. They provide access to all the General Purpose Input/Output (GPIO) pins of the STM32 microcontroller, allowing for maximum flexibility.
Can I use the Arduino IDE with a Nucleo board?
Yes, you can. There is an official STM32 core for the Arduino IDE that allows you to program Nucleo boards using the familiar Arduino language and environment. However, to unlock the full power and use the hardware debugger, using STM32CubeIDE is highly recommended.
What does the number on the Nucleo board mean (e.g., F446RE)?
The number identifies the specific STM32 microcontroller on the board. STM32F446RET6 is the full part number. F4 indicates the high-performance family, 46 is the sub-family, R indicates the 64-pin package, E indicates 512 KB of Flash, and T6 is the package type.