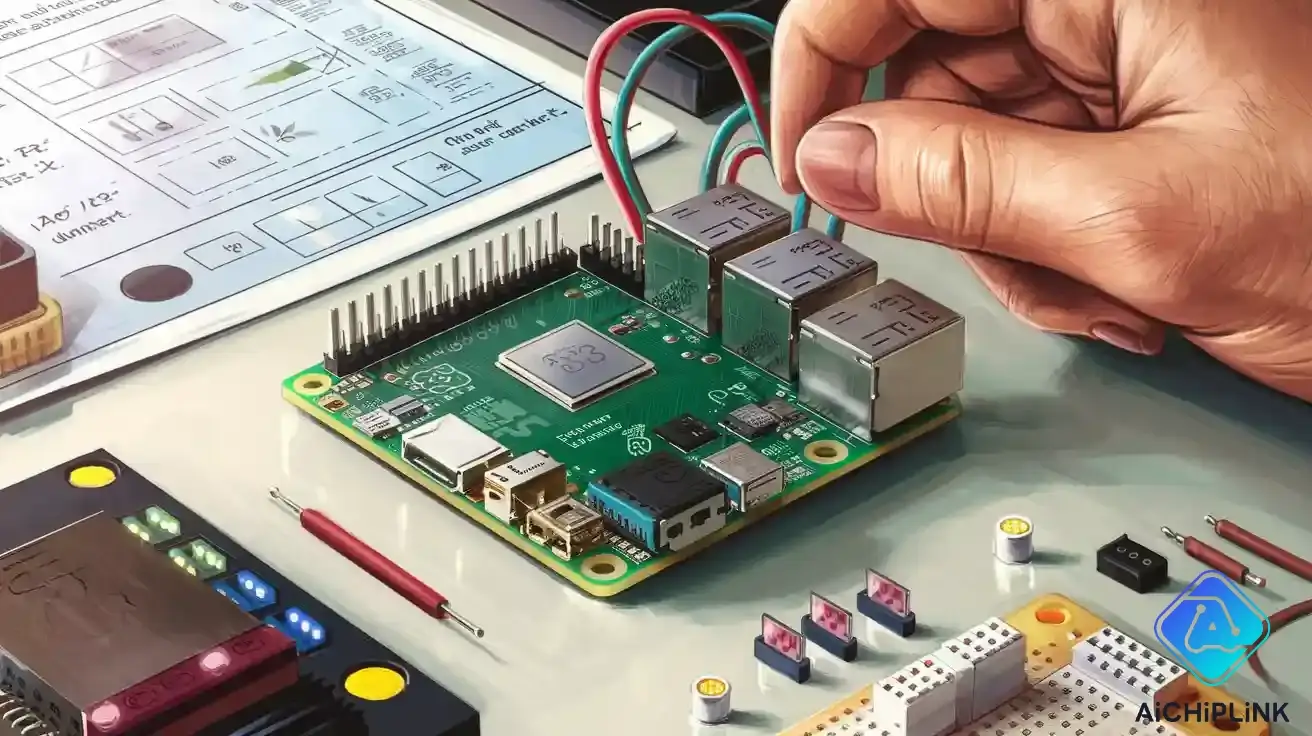
The raspberry pi 3 pinout shows how each pin connects to hardware. You use the 40-pin GPIO header to connect sensors and devices. This is for projects like home automation or robotics. Many people use the pinout diagram to find the right pin. Some pins are for power, ground, or communication. A clear diagram helps you avoid mistakes and damage. You need to know the raspberry pi 3 pinout and specs. This helps you use relay modules and control appliances. It also helps you build interactive systems safely.
Tip: Always check the pinout diagram before you connect wires to your raspberry pi 3 model b. This keeps your hardware safe and helps your projects work.
-
Common uses for the raspberry pi pinout include:
-
Building robots
-
Watching environments
-
Making interactive art
-
Learning electronics and programming
Key Takeaways
-
The Raspberry Pi 3 has a 40-pin GPIO header. It has power, ground, and 28 general-purpose input/output pins. You use these pins to connect sensors and devices.
-
Always look at the pinout diagram before you do any wiring. This helps you avoid mistakes and keeps your Raspberry Pi safe from harm.
-
Use resistors with LEDs. Use level shifters for devices that need more than 3.3V. This will help keep your board safe.
-
You can program GPIO pins with Python. Use the RPi.GPIO library to do this. You can control LEDs, buttons, sensors, and communication protocols.
-
Start with easy projects like blinking LEDs or reading buttons. This helps you learn. Then try harder projects like robots or home automation.
Raspberry Pi 3 Pinout Overview
40-Pin Header
The 40-pin extended gpio header on the Raspberry Pi 3 gives you a powerful way to connect your board to the outside world. You get a total of 40 pins, which include power, ground, and 28 general-purpose input/output pins. These gpio pins let you send signals out or read signals in. You can use them to control LEDs, read buttons, or talk to sensors. The gpio pinout also includes special pins for communication, like UART, I2C, and SPI.
The raspberry pi 3 pinout stands out because it offers more connectivity than older models. Earlier boards, like the original Model B, only had 26 pins. With the 40-pin header, you have more options for projects and accessories. This standard header makes it easier to find guides and add-ons that work with your board.
You can use the gpio pins to build robots, automate your home, or make interactive art. Each pin has a specific role, so you need to check the pinout before connecting anything. This helps you avoid mistakes and keeps your raspberry pi 3 safe.
Note: The gpio pin count includes both basic and special function pins. Always double-check the pinout diagram before wiring your project.
Pin Types
The raspberry pi pinout includes several types of pins, each with a unique job. Here is a quick overview:
-
Power pins: Pins 1 and 17 give you 3.3V. Pins 2 and 4 provide 5V. You use these to power sensors or small devices.
-
Ground pins (GND): Pins 6, 9, 14, 25, 30, 34, and 39 connect to ground. These complete the circuit for your devices.
-
General-purpose input/output pins: You get 28 gpio pins. You can set each one as an input or output. For example, you can use pin 22 to turn on an LED or read a button press.
-
Special function pins: Some gpio pins do more than just input or output. Pin 14 works as a UART transmit pin for serial communication. Pin 32 can send PWM signals to control things like motor speed or LED brightness.
-
Dual numbering system: You can refer to pins by their physical location or by their gpio number. This helps you write scripts and follow hardware guides more easily.
The variety of pin types on the raspberry pi 3 gives you more flexibility than older models. The 40-pin header first appeared on the Model B+ and continues in newer boards. This means you can use a wide range of accessories and shields designed for the gpio pinout.
You can use the general-purpose input/output pins to connect almost any electronic part. The extra pins and clear layout make the raspberry pi 3 a great choice for learning and building new projects.
Raspberry Pi Pinout Diagram
Pin Numbering
When you look at a raspberry pi pinout diagram, you see two ways to number the pins. The first way uses the physical pin numbers. These numbers go from 1 to 40, starting at the top left corner of the header. The second way uses the GPIO numbers. These numbers match the names used in your code. For example, physical pin 11 is GPIO 17. This dual system helps you connect hardware and write programs more easily.
The standard layout for the Raspberry Pi 3 pin numbering makes your projects more reliable. The 40-pin header gives you access to 28 GPIO pins, plus power and ground. Many guides and libraries, like Pi4J and WiringPi, use this numbering scheme. This means you can follow tutorials and use code that works across different Raspberry Pi models. You do not have to worry about hardware changes breaking your project.
Tip: Always check both the physical pin number and the GPIO number in your pin diagram before connecting anything.
Pin Labels
Each pin on the raspberry pi pinout has a special label. These labels tell you what each pin does. Some pins give you 3.3V or 5V power. Others connect to ground. Most pins work as GPIO, which means you can use them for input or output. Some pins have extra features, like I2C, SPI, or UART for communication.
Here is a simple pinout diagram for the Raspberry Pi 3 Model B:
| Pin | Label | Function |
|---|---|---|
| 1 | 3.3V | Power |
| 2 | 5V | Power |
| 3 | GPIO 2 | I2C SDA |
| 4 | 5V | Power |
| 5 | GPIO 3 | I2C SCL |
| 6 | GND | Ground |
| 7 | GPIO 4 | GPIO |
| 8 | GPIO 14 | UART TX |
| 9 | GND | Ground |
| 10 | GPIO 15 | UART RX |
You can find the full raspberry pi pinout diagram online or in the official documentation. The pin diagram shows you which pins to use for power, ground, GPIO, and communication. This helps you avoid mistakes and keeps your Raspberry Pi safe.
Specifications
Processor and RAM
You get a powerful processor with the raspberry pi 3 model b. The board uses the broadcom bcm2837 chip, which has a 64-bit quad-core ARM Cortex-A53 CPU running at 1.2GHz. This processor lets you run many programs at once and handle complex tasks. The raspberry pi 3 also comes with 1GB of LPDDR2 RAM. This memory helps you multitask and run bigger projects, like media centers or small servers.
Here is a quick look at the main specs:
| Specification Category | Details |
|---|---|
| SoC | broadcom bcm2837 |
| CPU | 4× ARM Cortex-A53 cores at 1.2GHz |
| GPU | Broadcom VideoCore IV |
| RAM | 1GB LPDDR2 (900 MHz) |
Power and Voltage
You power the raspberry pi 3 with a standard micro USB cable. The board needs a 5V input and can draw up to 2.5A. The GPIO pins use 3.3V logic levels. You must never connect 5V directly to these pins, or you risk damaging the board. Always check your power supply to make sure it meets the specs.
| Parameter | Value/Range | Notes |
|---|---|---|
| GPIO Voltage Level | 3.3 V | Not 5V tolerant |
| Maximum Input Voltage | 3.3 V | Higher voltages can damage the pins |
⚠️ Tip: Use a logic level converter if you need to connect 5V devices to the GPIO pins.
Current Limits
Each GPIO pin on the raspberry pi 3 can safely handle up to 16mA of current. The total current from all GPIO pins should stay below 50mA. If you go over these limits, you could damage the pins or the power regulator. Always use resistors and check your circuit before turning on the board.
If you connect a voltage higher than 3.3V to a GPIO pin, you risk permanent damage. The board does not have built-in over-voltage protection. Using level shifters keeps your raspberry pi 3 safe when working with other devices.
Interfaces
The raspberry pi 3 model b gives you many ways to connect devices. You get four USB 2.0 ports for keyboards, mice, and storage. The HDMI port lets you connect a monitor or TV. The CSI camera port supports camera modules for photos and video. The DSI port connects to touchscreen displays, which helps you build interactive projects. You also get built-in Wi-Fi, Bluetooth 4.1, and Ethernet for networking. The 40-pin GPIO header lets you connect sensors, LEDs, and other electronics.
| Interface | Description |
|---|---|
| GPIO Pins | 40-pin header for sensors and circuits |
| USB Ports | 4 × USB 2.0 for peripherals |
| HDMI Port | Video and audio output |
| CSI (Camera Serial Interface) | Connects camera modules |
| DSI (Display Serial Interface) | Connects touchscreen displays |
| Audio Jack | 3.5mm sound output |
| Ethernet Port | Wired internet |
| Wi-Fi and Bluetooth | Wireless communication |
| SPI/I2C/UART | Communication with other chips and sensors |
These interfaces make the raspberry pi 3 a flexible tool for many projects. You can build robots, smart displays, or even small servers using these specs.
Raspberry Pi 3 Pinout Functions
Power Pins
You find several power pins on the raspberry pi 3 pinout. These pins give your projects the energy they need. The main power pins are:
-
Pin 1: 3.3V power output
-
Pin 2: 5V power output
-
Pin 4: 5V power output
-
Pin 6: Ground (GND)
-
Pin 9, 14, 20, 25, 30, 34, 39: Ground (GND)
The 5V pins (Pin 2 and Pin 4) provide up to about 5.25V to 5.3V, matching USB power standards. You should never use more than this voltage, or you risk damaging your raspberry pi 3. Always use a regulated 5V power source. The GPIO power pins do not have fuse protection, so double-check your wiring before turning on the board.
⚡ Tip: Always measure your supply voltage at the GPIO header. Voltage drops can happen in cables and connectors.
GPIO Pins
The raspberry pi gpio pinout gives you 28 general-purpose input/output pins. You can use these pins to control LEDs, read button presses, or spin motors. Each gpio pin can act as an input or output. You control these pins with code, using languages like Python or C.
-
You can set a gpio pin as an output to turn on an LED.
-
You can set a gpio pin as an input to read a button press.
-
You can use gpio pins for digital signals (HIGH or LOW).
-
You can use some gpio pins for special functions, like PWM or communication.
The general-purpose input/output pins let you build many types of projects. You can toggle LEDs, read sensors, or control devices with PWM signals. The raspberry pi 3 pinout uses both physical pin numbers and Broadcom chip numbers. Always check which numbering system your code uses.
🛡️ Safety Note: Use a resistor (220 ohms is common) when connecting LEDs to gpio pins. This protects your board from too much current.
Communication Pins
You use communication pins to connect your raspberry pi 3 to other devices. The main communication protocols are I2C, SPI, and UART. Each protocol uses specific gpio pins.
| Communication Protocol | Pins (GPIO) | Pin Function | Typical Applications |
|---|---|---|---|
| I2C | GPIO 2, GPIO 3 | SDA (GPIO 2), SCL (GPIO 3) | Connect i2c devices like sensors, displays, or expanders. |
| SPI | GPIO 7, 8, 9, 10, 11 | CE1, CE0, MISO, MOSI, CLOCK | Connect spi devices such as fast sensors or displays. |
| UART | GPIO 14, GPIO 15 | TX (GPIO 14), RX (GPIO 15) | Connect uart devices for serial communication or debugging. |
I2C
You use the sda and scl pins (GPIO 2 and GPIO 3) for I2C. I2C lets you connect many i2c devices, like sensors or displays, on the same two wires. Each device has a unique address. You must enable the I2C interface in your settings before use.
SPI
SPI uses five gpio pins: GPIO 7, 8, 9, 10, and 11. You use SPI for high-speed communication with spi devices, such as certain sensors or screens. Each device gets a chip select line.
UART
UART uses GPIO 14 (TX) and GPIO 15 (RX). You use these pins to connect uart devices, like GPS modules or for debugging. UART is simple and works well for direct serial connections.
💡 Tip: Always check the voltage levels of your connected devices. The raspberry pi 3 gpio pins work at 3.3V. Use level shifters if your devices use higher voltages.
PWM Pins
PWM stands for Pulse Width Modulation. You use PWM pins to control things like LED brightness or motor speed. The raspberry pi 3 has four hardware PWM pins: GPIO 12, 13, 18, and 19. You can also create software PWM on most other gpio pins, except GPIO 0 and 1.
PWM works by turning the pin on and off very quickly. By changing how long the pin stays on, you control the average power sent to a device. For example, you can make an LED fade in and out by adjusting the PWM duty cycle.
You can use the gpiozero Python library to control PWM pins. This library has tools like PWMLED and Motor to help you create effects easily. You can also use PWM to control servos or fans.
⚠️ Warning: Never connect motors or high-power devices directly to gpio pins. Use a transistor or relay to protect your raspberry pi 3.
Practical Usage Tips and Safety Warnings
-
Double-check all wiring before powering your raspberry pi 3.
-
Use resistors with LEDs to protect gpio pins.
-
Avoid short circuits by using a breadboard and keeping metal objects away.
-
Power off your board before connecting or disconnecting components.
-
Use level shifters for devices that use more than 3.3V.
-
Make sure your power supply can handle all connected devices.
-
Use relays or transistors for high-power loads.
📝 Note: The raspberry pi 3b+ gpio pinout is similar to the raspberry pi 3 model b. Always check the official diagram for your board.
Raspberry Pi GPIO Pinout Programming
Setup
To start programming the raspberry pi gpio pinout, you need to set up your Raspberry Pi 3 and prepare the software. Follow these steps:
-
Connect your Raspberry Pi 3 to a monitor, keyboard, and mouse.
-
Make sure your Raspberry Pi OS is up to date.
-
Open a terminal and install the required Python packages by running:
sudo apt-get update sudo apt-get install python3-dev python3-rpi.gpio -
Check your wiring and connect any LEDs, buttons, or sensors to the correct gpio pins.
-
Use the RPi.GPIO library in your Python scripts. This library makes it easy to control gpio pins.
-
Always include cleanup commands in your code to safely release the gpio pins after your program runs.
Tip: The RPi.GPIO library is the best choice for beginners. It is well documented and easy to use.
Python Examples
You can use Python to control gpio pins on your Raspberry Pi 3. Here is a simple example that turns an LED on for five seconds, then turns it off:
import RPi.GPIO as GPIO
import time

led_pin = 12
GPIO.setwarnings(False)
GPIO.setmode(GPIO.BCM)
GPIO.setup(led_pin, GPIO.OUT, initial=GPIO.LOW)

GPIO.output(led_pin, GPIO.HIGH)
time.sleep(5)
GPIO.output(led_pin, GPIO.LOW)
GPIO.cleanup()
-
Import the RPi.GPIO library and set the mode to BCM.
-
Set up the gpio pin as output.
-
Turn the LED on and off using
GPIO.output. -
Always call
GPIO.cleanup()at the end.
You can also read input from buttons or sensors by setting a gpio pin as input and using GPIO.input(pin_number).
Troubleshooting
If your gpio pins do not work as expected, try these steps:
-
Make sure you installed the RPi.GPIO library for your version of Python.
-
Double-check if you are using the correct numbering mode (BCM or BOARD).
-
Try switching the numbering mode in your code to see if it fixes the issue.
-
Use the
gpiocommand from the wiringPi library to check pin states. -
Use the
piscopetool to watch gpio logic levels. -
Check ribbon cable orientation if you use a cobbler.
-
Enable warnings in your code with
GPIO.setwarnings(True)for helpful messages. -
If your system freezes, switch to a console with
Alt-Ctrl-F1to check logs.
Note: Always check your wiring and code before running your project. Careful setup helps you avoid common gpio problems.
Raspberry Pi 3 Projects
You can start learning electronics and programming with simple raspberry pi projects. The GPIO pinout lets you connect many components and build interactive systems. These projects help you understand how each pin works and how to use them safely.
LED Project
A blinking LED is one of the best beginner projects. You connect an LED and a resistor to a GPIO pin. Then, you write a short Python script to turn the LED on and off. This project teaches you how to control output pins and use basic code. You can try different blink speeds or add more LEDs for patterns.
import RPi.GPIO as GPIO
import time

GPIO.setmode(GPIO.BCM)
GPIO.setup(18, GPIO.OUT)

while True:
    GPIO.output(18, GPIO.HIGH)
    time.sleep(1)
    GPIO.output(18, GPIO.LOW)
    time.sleep(1)
Tip: Always use a resistor with your LED to protect the GPIO pin.
Button Project
You can use a button to control your Raspberry Pi 3. Connect a button to a GPIO pin and ground. When you press the button, your code can turn on an LED or print a message. This project helps you learn about input pins and how to read their state.
-
Connect one side of the button to GPIO 17.
-
Connect the other side to ground.
-
Write a script to check if the button is pressed.
Sensor Project
Sensors make your projects smarter. You can use a DHT11 or DHT22 sensor to measure temperature and humidity. Connect the sensor to the correct GPIO pins. Read the data in your script and display it on the screen. You can also try a PIR motion sensor or an ultrasonic distance sensor. These sensors help you build home automation or security projects.
| Sensor Type | Use Case |
|---|---|
| DHT11/DHT22 | Temperature, Humidity |
| PIR | Motion Detection |
| HC-SR04 | Distance Measurement |
Communication Project
You can connect your Raspberry Pi 3 to other devices using communication pins. Try using I2C or SPI to talk to modules like real-time clocks or displays. For example, you can add a real-time clock (RTC) module to keep track of time, even when the Pi is off. You can also use UART pins to send and receive data from GPS modules or other computers.
Note: Always check the voltage levels before connecting new modules.
Intermediate Ideas
When you feel ready, try more advanced projects. Build a digital clock using a Sense HAT, which connects to the GPIO header. Create an RFID attendance system with an RC522 reader. Use an ultrasonic sensor to measure distance for a robot. Add a real-time clock module to track time in your home automation system. You can also control motors with a motor driver board for robotics projects. Many raspberry pi add-on boards make these tasks easier and safer.
These projects help you learn how to use the GPIO pinout for real-world applications. You can automate your home, build robots, or collect weather data. Each project gives you new skills and ideas for your next creation.
Datasheet and Schematic
Where to Find
You can get the official Raspberry Pi 3 datasheet and schematic from the Raspberry Pi Foundation’s website. These files are free for anyone to download. The datasheet explains the board’s hardware in detail. The schematic shows how each part connects on the board. Always use the official website to make sure your information is correct and current.
📄 Tip: Type “Raspberry Pi 3 Model B schematic” or “Raspberry Pi 3 datasheet” into the search bar on the official Raspberry Pi website. You will find PDF files you can download for your projects.
How to Use
The datasheet and schematic help you learn more about your Raspberry Pi 3. You use them to check pin layouts, voltage limits, and wiring details. These documents are useful when you build big projects or fix hardware problems.
Here are some ways you can use the datasheet and schematic:
-
Find each part on the board, like the processor, memory, and connectors.
-
Locate important pins, such as TX and RX for serial communication (GPIO 14 and 15).
-
Check voltage and current limits to keep your board safe.
-
Make sure your wiring and connections are correct before turning on the board.
-
Find the RUN jumper to do a soft reset if your board freezes.
-
Use the schematic to follow signals and look for problems in your circuits.
You can also use the datasheet to check technical details while working on your project. The table below lists some common details you might need:
| Technical Detail Category | Key Details and Usage in Projects |
|---|---|
| GPIO Pin Layout and Functions | 40-pin header with pins for power (3.3V, 5V), ground, and programmable GPIO; supports PWM, I2C, SPI, UART protocols. |
| Voltage and Current Limits | GPIO pins work at 3.3V logic; max 16mA per pin, 54mA total; use resistors and level shifters to prevent damage. |
| Communication Protocols | I2C (SDA, SCL), SPI, UART, PWM are used for sensor and device connections. |
| Power Requirements | Needs a steady 5V power supply with at least 2.5A for Wi-Fi, USB devices, and stable operation. |
| Processor and Memory Specs | Broadcom BCM2837 quad-core CPU (1.2-1.4GHz), 1GB LPDDR2 RAM, microSD storage. |
| Connectivity Options | Wi-Fi (2.4GHz/5GHz), Bluetooth 4.1/4.2, Ethernet (10/100 Mbps or Gigabit). |
| Ports | 4 USB 2.0, full-size HDMI, CSI camera port, DSI display port, 40-pin GPIO header. |
| Safety and Wiring Tips | Double-check wiring, use resistors for LEDs, turn off power before connecting, avoid shorts, use pinout diagrams. |
| Pin Numbering Schemes | Board numbering (physical pin order) and BCM numbering (Broadcom SOC channels) for programming and hardware design. |
| Accessory Compatibility | Cooling solutions, camera modules, cases, power supplies, and input devices help with project building. |
🛠️ Note: The datasheet and schematic do not give step-by-step troubleshooting instructions. They give you hardware details to help you solve problems and build safe projects.
When you learn the Raspberry Pi 3 pinout, you can do a lot. The GPIO header lets you add LEDs, sensors, and motors. Picking the right pins and using protection keeps your board safe.
-
Always check the voltage before you connect anything.
-
Use short, good cables to stop problems.
-
Look at official guides, Python tips, and forums for help.
Knowing the pinout helps you make safe and fun projects. It lets you turn your ideas into real things.
FAQ
What is the main purpose of the Raspberry Pi 3 GPIO pins?
You use the GPIO pins to connect your Raspberry Pi 3 to electronic parts like LEDs, buttons, and sensors. These pins let you control devices or read signals from them. You can build many projects using these connections.
Can you power devices directly from the Raspberry Pi 3 GPIO header?
You can power small devices like sensors or LEDs from the 3.3V or 5V pins. Always check the current limits. Never connect large motors or high-power devices directly. Use relays or external power for those.
How do you avoid damaging your Raspberry Pi 3 when wiring?
You should always double-check your wiring before turning on the board. Use resistors with LEDs. Never connect more than 3.3V to GPIO pins. Power off your Raspberry Pi 3 before making changes.
Which programming languages can you use for GPIO projects?
You can use Python, C, or Scratch to control the GPIO pins. Python is the most popular because it is easy to learn and has many libraries for Raspberry Pi projects.
Where can you find official Raspberry Pi 3 pinout diagrams?
You can find official pinout diagrams on the Raspberry Pi Foundation website. These diagrams show each pin’s function and help you connect your hardware safely.

Written by Jack Elliott from AIChipLink.
AIChipLink, one of the fastest-growing global independent electronic components distributors in the world, offers millions of products from thousands of manufacturers, and many of our in-stock parts is available to ship same day.
We mainly source and distribute integrated circuit (IC) products of brands such as Broadcom, Microchip, Texas Instruments, Infineon, NXP, Analog Devices, Qualcomm, Intel, etc., which are widely used in communication & network, telecom, industrial control, new energy and automotive electronics.
Empowered by AI, Linked to the Future. Get started on AIChipLink.com and submit your RFQ online today!


