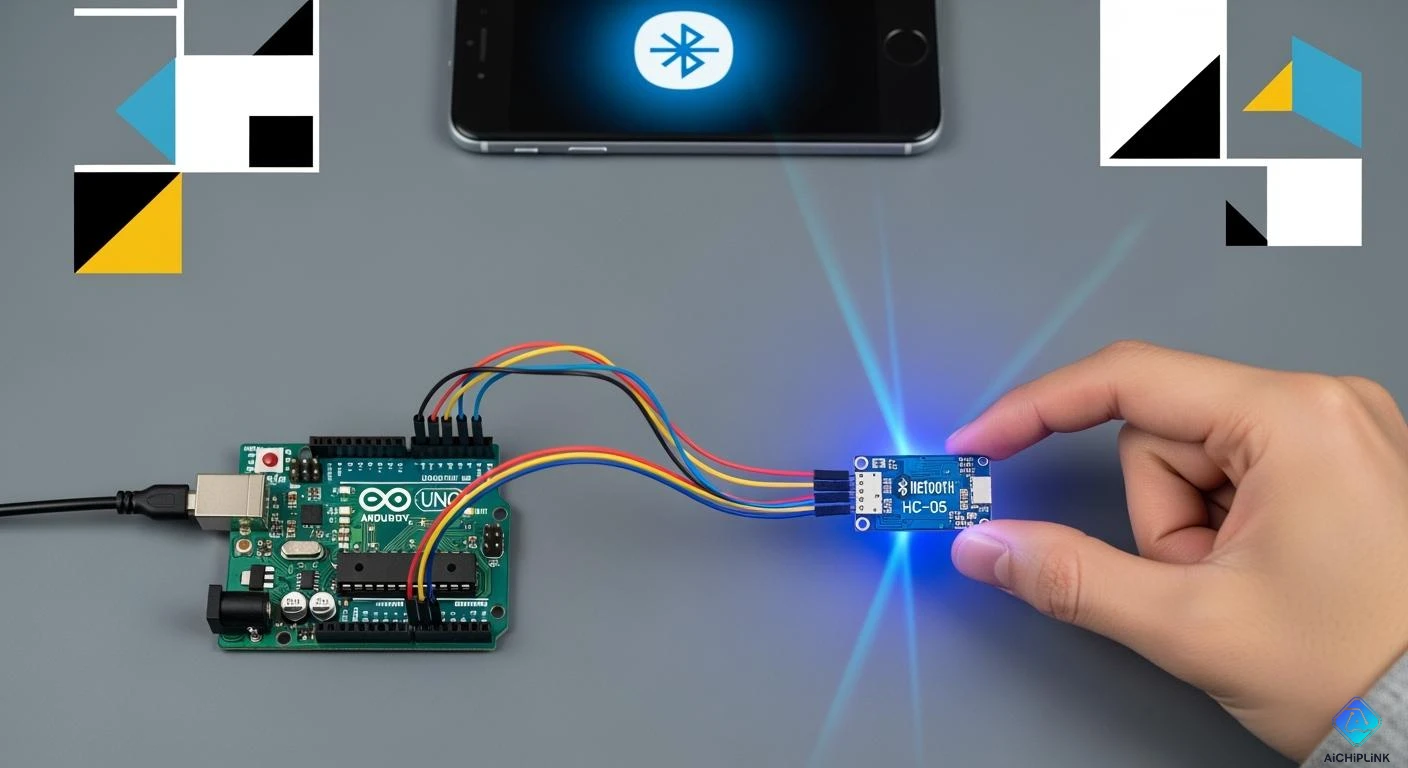
How to use the HC-05 Bluetooth Module with Arduino
You can make your Arduino projects wireless with the hc-05 bluetooth module. Many beginners pick this module because it is easy to use and cheap. If you want to control things or send data without wires, the hc-05 is a good choice for your setup. You can use at commands to change settings or connect to your smartphone. The module lets you try your ideas quickly, and you do not need special tools.
Key Takeaways
-
The HC-05 Bluetooth module lets Arduino projects work without wires. It is simple for beginners to use.
-
You should use a voltage divider for the RXD pin. This keeps the HC-05 safe from too much voltage.
-
Connect the HC-05 to your phone or computer. Use a default PIN like 1234 or 0000.
-
Use the SoftwareSerial library to make a serial connection. This helps you avoid problems with Arduino’s main serial pins.
-
AT command mode lets you change settings. You can set the device name, password, and baud rate.
Components Needed
HC-05 Bluetooth Module
You need the hc-05 Bluetooth module to send data without wires. This module works with arduino and helps you talk to other devices. The hc-05 uses Bluetooth 2.0 + EDR. It works on the 2.4 GHz ISM band. You can use it for short distances, up to 10 meters. The module can be a master or a slave. This means it can connect to many devices.
Here is a table that shows the main pins and what they do:
| Pin | Function | Description |
|---|---|---|
| VCC | Power Supply Input | Gives power to the module. It takes 3.6V to 6V. It has a voltage regulator inside. |
| GND | Ground | This is the common ground. Connect it to the ground of your power and arduino. |
| TXD | Serial Data Output | Sends data to your arduino. Connect it to the RX pin. |
| RXD | Serial Data Input | Gets data from your arduino. You need to lower the voltage for 5V systems. |
| STATE | Connection Status Output | Shows if Bluetooth is connected. LOW means not connected, HIGH means connected. |
| EN | Enable / AT Mode Control | Turns on special modes like AT command mode. Pull HIGH when starting up. |
The hc-05 uses UART to talk to your arduino. You can change its settings with AT commands. The default speed is 9600 baud. The data pins use 3.3V logic. You may need a voltage divider if your arduino uses 5V.
Tip: Always check your power and wires before you connect the hc-05. This keeps the module safe from damage.
Arduino Board and Accessories
You need an arduino board to use the hc-05. The arduino UNO is a good choice, but other boards work too. The arduino sends and gets data with the TX and RX pins. You also need some extra parts to finish your setup.
Here is a list of what you need:
-
Arduino board (like the Arduino UNO)
-
HC-05 Bluetooth Module
-
Breadboard (half-size or full-size)
-
5mm LED (any color)
-
Resistors:
-
200Ω resistor (for the LED)
-
1kΩ resistor (for the voltage divider)
-
2kΩ resistor (for the voltage divider)
-
-
Jumper wires (male-to-male and male-to-female)
The breadboard helps you make neat and easy connections. The resistors protect the LED and set the right voltage for the hc-05. Jumper wires let you connect everything without soldering. The arduino and hc-05 work together to make a wireless system. You can control things like LEDs from your phone or computer.
The hc-05 Bluetooth module is made for steady wireless use in arduino projects. You can use it in robots, sensors, and smart homes. The range is about 10 meters, but walls can make it shorter. Always test your project where you will use it for best results.
HC-05 Bluetooth Module Wiring
Pin Connections
You need to connect the hc-05 bluetooth module to your arduino using the right pins. This step is important for a safe and working setup. The hc-05 uses serial communication to talk with your arduino. You must match the correct pins for a reliable connection.
Here is a table that shows the main pin connections for the hc-05 and arduino:
| HC-05 Pin | Arduino Pin | Function |
|---|---|---|
| VCC | 5V | Powers the hc-05 module |
| GND | GND | Common ground |
| TXD | Pin 10 | Arduino receives data |
| RXD | Pin 11 (through voltage divider) | Arduino sends data safely |
| STATE | Not required | Shows bluetooth connection |
| EN/KEY | Digital Pin or Button | Used for AT mode |
The hc-05 bluetooth module works at 3.3V logic. The arduino sends signals at 5V. If you connect the arduino TX pin directly to the hc-05 RXD pin, you can damage the module. You must use a voltage divider to lower the voltage to a safe level. You can use a 1kΩ resistor and a 2kΩ resistor to make the voltage divider.
Tip: Always double-check your wiring before powering up. This helps prevent damage to your hc-05 and arduino.
The table below shows how to connect the power and data lines for a safe arduino-to-hc-05 link:
| From | To | Purpose |
|---|---|---|
| Arduino 5V | HC-05 VCC Pin | Powers the bluetooth module |
| Arduino GND | HC-05 GND Pin | Provides a common ground |
| Arduino Pin 10 | HC-05 TXD Pin | Arduino receives data from hc-05 |
| Arduino Pin 11 | Voltage Divider Output (to HC-05 RXD Pin) | Arduino sends data safely to hc-05 |
You must use the voltage divider for the RXD pin. The TXD pin from the hc-05 can connect directly to the arduino RX pin because the arduino can read 3.3V signals.
Step-by-Step Setup
You can follow these steps to complete your hc-05 bluetooth module wiring and get ready for your bluetooth setup:
-
Place your arduino and hc-05 on a breadboard for easy wiring.
-
Connect the VCC pin of the hc-05 to the 5V pin on the arduino. This gives the module the right power.
-
Connect the GND pin of the hc-05 to the GND pin on the arduino. This makes a common ground for both devices.
-
Connect the TXD pin of the hc-05 to pin 10 on the arduino. This pin will receive serial data from the module.
-
Build a voltage divider for the RXD pin:
-
Connect a 1kΩ resistor from arduino pin 11 to the RXD pin of the hc-05.
-
Connect a 2kΩ resistor from the RXD pin to ground.
-
This lowers the 5V signal from the arduino to about 3.3V, which is safe for the hc-05.
-
-
If you want to use AT command mode, connect the EN/KEY pin to a digital pin on the arduino or use a button. Hold the EN/KEY pin HIGH while powering up the hc-05 to enter AT mode. This lets you change settings like the device name or baud rate.
-
Check all connections before turning on the power. Make sure the voltage divider is in place to protect the hc-05.
-
After wiring, you can upload your code and start your bluetooth connection.
Note: The hc-05 bluetooth module works with many arduino boards, such as the UNO, Mega, and Nano. You can use the same wiring steps for each board. The module uses UART serial connection, so you can use SoftwareSerial to pick different pins if needed.
The hc-05 supports Bluetooth 2.0 + EDR. Most Android phones can connect to it. Some iOS devices may not work because they use Bluetooth Low Energy (BLE). You can use the module in both Master and Slave modes. This means you can connect two arduinos or an arduino and a smartphone.
You must always use the voltage divider for the RXD pin. This keeps your hc-05 safe from high voltage. The TXD pin does not need a divider because the arduino can read 3.3V signals.
Safety Reminder: Never connect the arduino TX pin directly to the hc-05 RXD pin without a voltage divider. This can break your module.
You have now finished the wiring and setup for your hc-05 bluetooth module. You are ready to move on to the next part of the tutorial and start coding your arduino for wireless control.
Arduino Code for HC-05 Bluetooth Module
Using SoftwareSerial Library
You can use the softwareserial library to create a new serial connection on your arduino. This library helps you avoid conflicts with the main serial pins. The main serial pins are often used for programming and debugging. The hc-05 bluetooth module needs a serial connection to talk to your arduino. You can pick any two digital pins for the arduino-to-hc-05 link. The softwareserial library lets you set up a serial port on pins that work best for your project.
The hc-05 uses UART serial communication. You must set the right baud rate for the serial connection. The default baud rate for the hc-05 is 9600. You can change this setting with at commands if you need a different speed. The initial configuration for the hc-05 should match the serial settings in your arduino sketch. This helps prevent data errors.
Tip: Always check your serial settings before you upload your sketch. This keeps your hc-05 configuration safe and working.
Example Code and Explanation
You can use a simple sketch to control an LED with your hc-05. This code for led bluetooth control lets you send commands from your phone to turn the LED on or off. You can use the serial connection to read commands and change the LED state.
-
Send commands like
1and0to control the LED. -
Watch the communication in real time.
Here is a sample sketch for basic bluetooth communication and device control:
#include <SoftwareSerial.h>
SoftwareSerial BTSerial(10, 11); // RX, TX

char Incoming_value = 0;

void setup() {
  BTSerial.begin(9600); // Start serial connection with hc-05
  Serial.begin(9600);   // Start serial for debugging
  pinMode(13, OUTPUT);  // Set LED pin as output
}

void loop() {
  if (BTSerial.available() > 0) {
    Incoming_value = BTSerial.read(); // Read command from hc-05
    Serial.print(Incoming_value);     // Print command for debugging
    Serial.print("\n");
    if (Incoming_value == '1') {
      digitalWrite(13, HIGH);         // Turn LED ON
    } else if (Incoming_value == '0') {
      digitalWrite(13, LOW);          // Turn LED OFF
    }
  }
}
You can upload this sketch to your arduino. The hc-05 bluetooth module will listen for commands from your phone. When you send 1, the LED turns on. When you send 0, the LED turns off. The serial connection lets you see the commands in the serial monitor.
Note: Make sure you use the correct pins for the serial connection. The RX pin on the arduino connects to the TX pin on the hc-05. The TX pin on the arduino connects to the RX pin on the hc-05. Always use a voltage divider for the RX pin to protect the hc-05.
You can use at commands to change the settings of the hc-05. The command mode lets you set the device name, password, and baud rate. You must enter command mode by holding the KEY pin HIGH when you power on the hc-05. The initial at configuration helps you set up the module for your project.
Here is a table of common at commands for hc-05 configuration:
| AT Command | Function | Example | Typical Response |
|---|---|---|---|
| AT | Tests communication with the module | AT | OK |
| AT+PSWD=XXXX | Changes Bluetooth pairing password | AT+PSWD=4567 | OK |
| AT+NAME=XXXX | Changes Bluetooth device name | AT+NAME=MyHC05 | OK |
| AT+UART=Baud,Stop,Parity | Changes serial communication baud rate | AT+UART=9600,1,0 | OK |
You can send these commands in command mode to change the configuration. The at command mode uses a baud rate of 38400. You must set your serial terminal to CR+LF line endings. The hc-05 configuration lets you make the module fit your project needs.
Tip: Always check the response from the hc-05 after sending at commands. If you see "OK", the command worked.
You must avoid common mistakes in configuration. Here are some tips:
-
Make sure the KEY pin is HIGH before you power on the hc-05.
-
Use 38400 baud for at command mode.
-
Check RX and TX connections. Do not connect TX to TX or RX to RX.
-
Set the same baud rate for the arduino, serial terminal, and hc-05.
| Mistake | Explanation |
|---|---|
| Incorrect baud rate settings | This is a frequent cause of hc-05 at commands failing to respond correctly. |
| KEY pin not HIGH before power on | Ensure the KEY pin is HIGH before powering on to enter at command mode. |
| RX/TX connections miswired | Common error is connecting TX to TX and RX to RX instead of crossing them (TX to RX and RX to TX). |
| Baud rate mismatch | Ensure that the baud rate is consistent across the microcontroller code, serial terminal, and bluetooth module. |
You can use at commands to set up the hc-05 bluetooth module for your arduino project. The command mode lets you change settings and fix problems. The serial connection helps you send commands and get responses. You can use the code for led bluetooth control to test your setup. The sketch shows how to use serial communication to control devices.
You can now use your arduino and hc-05 to make wireless projects. The hc-05 configuration lets you change settings for different uses. The at commands help you set up the module for your needs. You can use the serial connection to send commands and control devices. The initial configuration makes your project work smoothly.
Pairing and Data Exchange
Pairing with Smartphone or Computer
You can create a bluetooth connection between your hc-05 and a smartphone or computer in just a few steps. This process lets you control your Arduino wirelessly and exchange data. Follow this setup to get started:
-
Open the Settings app on your smartphone and tap Bluetooth.
-
Start scanning for new devices. You will see a device called hc-05.
-
Tap on hc-05 to begin pairing. Your phone will ask for a PIN. Enter 1234 or 0000.
-
When the connection is successful, the blinking light on the hc-05 will slow down or stay solid.
-
Download a Bluetooth Terminal App from your app store.
-
Open the Bluetooth Terminal app and connect to hc-05.
-
Use the app to send commands and control your Arduino.
If you have trouble with the connection, check your wiring. The hc-05 needs a voltage divider on the RX pin to avoid damage. Make sure you set the module into AT mode if you want to change its settings. You also need the correct MAC address for a successful connection.
Sending and Receiving Data
After you finish pairing, you can start sending and receiving data over the bluetooth connection. The hc-05 uses serial communication to exchange information between your Arduino and your device. This wireless link lets you control devices or read sensor data.
-
The hc-05 allows data exchange using UART. Your Arduino sends data, and the module converts it into bluetooth signals for wireless transmission.
-
When your phone or computer sends data, the hc-05 changes it back into serial data for the Arduino to process.
-
Pairing creates a wireless serial link. You can send commands and receive responses in both directions.
The hc-05 supports data transfer rates up to 3Mbps with Enhanced Data Rate. In real projects, you usually get 100-300 kbps for reliable communication. This speed is enough for most Arduino tasks.
Here is a simple code example for testing your wireless connection:
#include <SoftwareSerial.h>
SoftwareSerial BTserial(2, 3); // RX | TX

void setup() {
  Serial.begin(9600);
  BTserial.begin(9600);
}

void loop() {
  BTserial.println("Bluetooth Test");
  Serial.println("Bluetooth Test");
  delay(1000);
}
To test your setup, connect the hc-05 to the Arduino using the correct pins. Upload the code. Pair your phone or computer with the hc-05. Open your Bluetooth Terminal app to see the messages sent from the Arduino.
Tip: Always check your connections before testing. Make sure the voltage divider is in place and the hc-05 is powered correctly. This helps prevent problems during wireless communication.
You can now use your hc-05 for many wireless projects. Try sending different commands and see how your Arduino responds. This hands-on testing helps you learn how bluetooth connection works and builds your confidence with wireless setups.
Troubleshooting
Common Connection Issues
You might have trouble connecting your hc-05. Some people say their hc-05 disconnects after a few seconds. Sometimes, it will not pair at all. You may be able to control something for a short time, but then it stops working. You might see errors like "BluetoothCtrl isn't responding" or "error515: not connected to a Bluetooth device." Restarting the app can help for a little while, but you should check your setup to fix the problem for good.
Here are some reasons why you might have connection problems:
-
The Power LED on the hc-05 does not turn on.
-
VCC and GND wires are not connected right.
-
TX and RX pins are not crossed the right way.
-
The ground is not shared between the hc-05 and Arduino.
-
The Bluetooth password is not correct.
-
The baud rate is not the same on both devices.
-
The KEY pin is not set right for at mode.
-
Bluetooth is turned off on your phone or computer.
-
The module is too far away.
-
Serial Monitor settings do not match your app.
You can use this table to help you fix problems:
| Problem | Possible Cause | Troubleshooting Tip |
|---|---|---|
| HC-05 Not Pairing | Incorrect password or pairing settings | Check Bluetooth password and pairing steps |
| No Serial Communication | TX/RX pins connected incorrectly | Cross TX and RX pins the right way |
| AT Commands Not Working | Incorrect at mode setup | Hold KEY/EN pin when turning on |
| Random Bluetooth Disconnects | Weak power supply | Use a good voltage source |
| Unstable Data Transfer | Electrical interference | Use short wires and good grounding |
| HC-05 Not Detected | Module not powered correctly | Check VCC and GND wires |
| Wrong Baud Rate | Incorrect UART settings | Match Arduino and hc-05 baud rates |
The hc-05 works best with Android phones. Most iPhones do not work with Bluetooth 2.0, so you may not be able to connect. Always check if your phone can use the hc-05 before you try to pair.
You can use at commands to check how your hc-05 is set up. Try these at commands for quick checks:
| AT Command | Function | Common Use |
|---|---|---|
| AT | Tests at command communication | Checks if the module answers |
| AT+NAME? | Reads the current Bluetooth name | Shows the module name before pairing |
| AT+UART? | Reads the current UART setting | Checks baud rate, stop bit, and parity |
| AT+ROLE? | Reads the current role | Checks if the module is master or slave |
Data Transfer Problems
You might have trouble sending data even if you connect. These problems usually happen because of wrong settings or wiring mistakes. Here are some common problems:
-
Baud rates that do not match can cause bad communication.
-
Wrong wiring can stop data from being sent.
-
Problems with your app or code can make the hc-05 not work right.
If you see random letters or numbers in your serial monitor, check the baud rate. Make sure the baud rate is the same in your Arduino code, serial terminal, and hc-05 settings. If your code or app does not work, check your commands and logic. Sometimes, a small mistake in your code or app can stop everything.
Try these steps to fix data loss or bad data:
-
Set a longer bootloader timeout, like 8 seconds, to give Bluetooth time to connect.
-
Always use the right baud rate in the hc-05 settings.
-
Do not write new firmware over old firmware right away.
-
Use extra memory to save new firmware before you update.
-
You can use a bootloader like DualOptiboot for safer updates.
Testing your setup helps you find problems early. Use at commands in at mode to check the module’s settings. Make sure you hold the KEY pin high when you turn on the hc-05 to enter at mode. This lets you send at commands and see answers. Always check your wires and settings before you start a new project.
You learned how to set up the HC-05 Bluetooth Module with Arduino in this tutorial. First, connect the hardware and wire the module. Next, upload your code and pair your device. Then, use a Bluetooth app to send commands and control an LED. This tutorial helps you start with wireless projects like home automation or robotics.

Written by Jack Elliott from AIChipLink.
AIChipLink, one of the fastest-growing global independent electronic components distributors in the world, offers millions of products from thousands of manufacturers, and many of our in-stock parts is available to ship same day.
We mainly source and distribute integrated circuit (IC) products of brands such as Broadcom, Microchip, Texas Instruments, Infineon, NXP, Analog Devices, Qualcomm, Intel, etc., which are widely used in communication & network, telecom, industrial control, new energy and automotive electronics.
Empowered by AI, Linked to the Future. Get started on AIChipLink and submit your RFQ online today!
Frequently Asked Questions
How do you enter AT command mode on the HC-05?
To enter AT command mode, hold the EN/KEY pin HIGH while powering up the module. The LED will blink slowly. You can now send AT commands using the correct baud rate.
Can you use the HC-05 with an iPhone?
Most iPhones do not support classic Bluetooth modules like the HC-05. You can use Android devices for wireless control. For iPhones, look for Bluetooth Low Energy (BLE) modules.
Why does your HC-05 not connect to your phone?
Check your wiring and power. Make sure the module appears in your phone’s Bluetooth list. Use the correct pairing code, usually 1234 or 0000. If problems continue, reset the module and try again.
What is the default baud rate for the HC-05?
The default baud rate is 9600 for normal operation. In AT command mode, the baud rate is 38400. Always match the baud rate in your Arduino code and serial monitor.
Can you control more than one device with the HC-05?
You can connect the HC-05 to one device at a time. To control multiple devices, use more modules or set up a master-slave network. Each module needs its own connection.