You often need to change how fast and which way motors turn in electronics and robotics. The L298N motor driver helps you do this job well. This driver works with both DC and stepper motors. That is why many people use it in different projects. You can find the L298N motor driver in electric vehicles, industrial machines, robots, smart homes, and solar systems:
| Application Area | Description |
|---|---|
| Electric Vehicles | Controls motors in electric bikes and scooters. It helps manage speed and direction. |
| Industrial Equipment | Runs motors in conveyor belts and robotic arms. This makes work faster and easier. |
| Robotics | Moves motors in robots for accurate actions. It helps robots do tricky moves. |
| Smart Homes | Automates things like blinds and doors. This makes life easier and saves energy. |
| Solar Systems | Changes solar panel angles for better energy. This can make them work up to 30% better. |
With this guide, you will feel ready to use the L298N motor driver in your own motor control projects.
Key Takeaways
-
The L298N motor driver can control DC and stepper motors. This makes it useful for many projects like robots and automation.
-
It has a dual H-bridge design. This lets you control two motors at the same time. Each channel can handle up to 2A of current.
-
Knowing the pinout is very important for safe wiring. Each pin does a special job to help control motor speed and direction.
-
PWM signals help you control motor speed very well. You can change how fast the motors spin for smoother movement.
-
The L298N works well with high voltage and high current. This makes it great for projects that need strong motor control.
L298N Motor Driver Overview
Features
You can use the l298n motor driver in many projects to control motors. This driver is special because it has a dual H-bridge design. It can run two motors at the same time. Each motor channel can handle up to 2A of current. You can use voltages from 2.5V to 48V, so it works with many motors. The l298n motor driver lets you change motor speed using PWM signals. This helps you control how fast your motors spin. The driver works well even if there is a lot of electrical noise. It has optocouplers that block this noise.
Here are some important features of the l298n motor driver:
-
Dual H-bridge design lets you control two motors together.
-
Each channel can handle up to 2A, good for medium motors.
-
Works with voltages from 2.5V to 48V.
-
PWM signals help you set motor speed exactly.
-
Optocouplers keep electrical noise away.
-
5V logic works with microcontrollers easily.
-
Built-in diodes protect motors from voltage spikes.
Tip: You can find a tutorial to learn how to use PWM signals with the l298n motor driver. This will help you control motor speed better.
| Advantage | Description |
|---|---|
| Versatility | Works with DC motors and stepper motors in many projects. |
| Bidirectional Control | Lets motors move forward or backward. |
| High Current Capability | Each bridge supports up to 2A, good for medium motors. |
| Simple Logic Interface | Easy logic inputs help you set direction and speed. |
| Built-in Protection | Flyback diodes keep motors safe from voltage spikes. |
Applications
You can find the l298n motor driver in many areas. It is used in robotics, automation, and motorized projects. The driver helps you control DC motors and stepper motors. You can build small vehicles or robots for fun. Many people use the l298n motor driver in 3D printers and CNC machines. Automated systems also use this driver for accurate motor control.
Here are some common uses for the l298n motor driver:
-
Robotics
-
Automation
-
Motorized projects
-
Automated systems
-
Small vehicle models
-
Hobbyist robotics
-
3D printers
-
CNC machines
If you want to start a project, you can look for a tutorial. It will show you how to connect the l298n motor driver to your motors. You will see that adding motor control is easy for your projects.
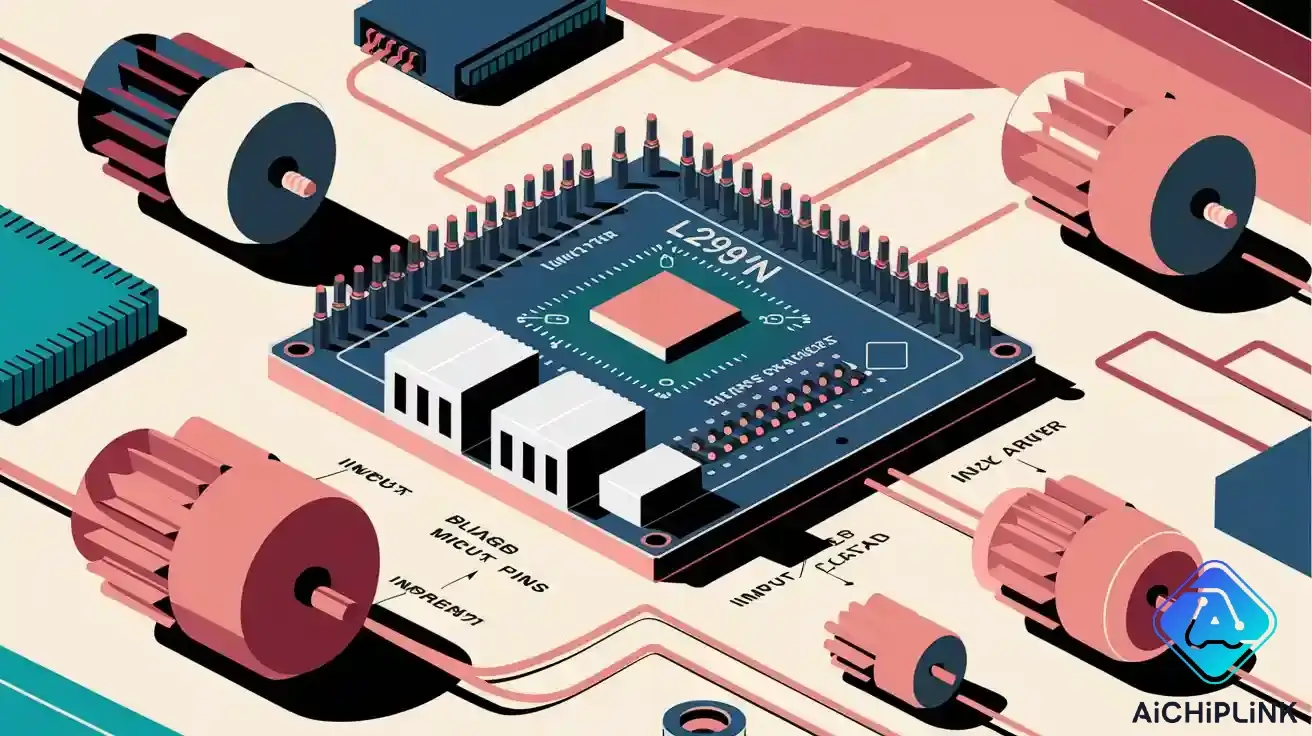
L298N Motor Driver Pinout
When you work with the l298n motor driver, understanding the pinout is very important. The pinout shows you where to connect each wire. This helps you control your motors safely and correctly. You can find all the main pins on the l298n motor driver board. Each pin has a special job in making the driver work with your motors.
Pin Configuration
You will see many pins on the l298n motor driver. Each pin helps you control the motors or powers the driver. The table below shows the pinout and what each pin does:
| Pin Name | Function |
|---|---|
| IN1, IN2 | Control the direction of Motor A |
| IN3, IN4 | Control the direction of Motor B |
| ENA | Enable and control speed of Motor A (use PWM signal) |
| ENB | Enable and control speed of Motor B (use PWM signal) |
| OUT1, OUT2 | Connect to Motor A terminals |
| OUT3, OUT4 | Connect to Motor B terminals |
| VCC | Connect to motor power supply (5V-35V) |
| GND | Ground connection |
| 5V | Power supply for logic circuit (input or output, depending on jumper) |
| Sense A, Sense B | Connect sense resistors to monitor current for Motor A and B |
| VS, VSS | Supply voltage for logic blocks |
You can use this pinout table as a quick guide when wiring your l298n motor driver. If you follow a tutorial, you will see these pin names used in the steps.
Pin Functions
Each pin on the l298n motor driver has a clear purpose. You need to know what each pin does before you connect your motors or microcontroller. Here is a list that explains the main functions:
-
IN1 and IN2: These pins set the direction for Motor A. If you change the signals, the motor spins forward or backward.
-
IN3 and IN4: These pins set the direction for Motor B.
-
ENA and ENB: These pins let you control the speed of each motor. You send a PWM signal from your microcontroller to these pins.
-
OUT1 and OUT2: Connect these pins to the terminals of Motor A.
-
OUT3 and OUT4: Connect these pins to the terminals of Motor B.
-
VCC: This pin connects to the power supply for your motors. You can use 5V to 35V.
-
GND: This pin connects to the ground of your power supply.
-
5V: This pin powers the logic part of the driver. You can use it as input or output, depending on the jumper setting.
-
Sense A and Sense B: You can connect sense resistors here to monitor the current for each motor.
-
VS and VSS: These pins supply voltage for the logic blocks inside the driver.
Note: Always check the pinout before you connect your motors. This helps you avoid mistakes and keeps your l298n motor driver safe.
Terminal Blocks
The l298n motor driver board has screw terminal blocks. These blocks make it easy for you to connect wires for motors and power supplies. You do not need to solder wires. You just loosen the screws, insert the wire, and tighten the screws.
Here is how you use the terminal blocks:
-
Power Connections:
-
Connect the GND pin to the ground of your power supply.
-
Connect the 5V pin to the 5V output of your microcontroller if needed.
-
Motor Connections:
-
Connect the terminals of Motor A to OUT1 and OUT2.
-
Connect the terminals of Motor B to OUT3 and OUT4.
-
-
Control Connections:
-
Connect ENA to a PWM-capable pin on your microcontroller for Motor A speed control.
-
Connect IN1 and IN2 to digital pins on your microcontroller for Motor A direction.
-
Connect ENB to a PWM-capable pin on your microcontroller for Motor B speed control.
-
Connect IN3 and IN4 to digital pins on your microcontroller for Motor B direction.
-
You can follow these steps in any tutorial about the l298n motor driver. The screw terminal blocks help you set up your project quickly. You can change wires easily if you need to fix something.
Tip: If you use the terminal blocks, make sure the wires are tight. Loose wires can cause your motors to stop or the driver to overheat.
The pinout of the l298n motor driver helps you connect everything the right way. You can control two motors at once. You can set the speed and direction for each motor. The terminal blocks make wiring simple and safe. If you learn the pinout, you will find it easy to use the l298n motor driver in your projects.
L298N Motor Driver Specifications
When you pick a l298n motor driver, you should know its details. These details help you choose the right module for your motors and circuit. You can use this information to make a safe and strong plan.
Electrical Ratings
You need to check the electrical ratings before using the l298n motor driver. These ratings tell you how much voltage and current the driver can take. Look at the table below to see the main details for the l298n motor driver:
| Specification | Value |
|---|---|
| Maximum Voltage | 46V |
| Continuous Current | 2A |
| Transient Peak Current | 3A |
| Logic Voltage | 5V |
| Drive Voltage | 5V~35V |
| Logic Current | 0mA~36mA |
| Maximum Power | 25W |
The l298n motor driver works with many voltages. You can use a supply from 5V to 35V for most projects. The logic voltage is always 5V, so it fits with many microcontrollers. If you want to learn how to connect the driver, you can find a tutorial with a diagram.
Note: Always check the details before turning on your motor driver. This helps you keep your motors and circuit safe.
Current and Voltage Limits
You should know the current and voltage limits for the l298n motor driver. These limits show how much power your motors can use. If you use too much, you can break the driver or your motors.
| Specification | Value |
|---|---|
| Maximum Continuous Current | 2.0 A |
| Peak Current | 3.0 A |
Each motor can use up to 2A all the time. If your motor needs more, pick a different driver. The l298n motor driver can handle short bursts up to 3A, but not for long. The best voltage range is 5V to 35V. Some places say you can use up to 46V, but most projects work best with 5V to 35V.
| Source | Voltage Range |
|---|---|
| Cirkit Designer | 5V to 35V |
| Jake Electronics | 6V to 46V |
Use these limits to plan your circuit. If you follow these details, your motor driver will work well.
Tip: If your motors need high voltage or high current, the l298n motor driver is a good pick. It works well in projects with strong motors and steady control.
Physical Specs
You should also check the size of the l298n motor driver. These details help you fit the driver in your project and plan your circuit. The module is about 3.2 cm long, 2.4 cm wide, and 1.8 cm tall. You can put the driver on a breadboard or inside a robot. The small size lets you use it in tight spaces.
There are holes on the board for mounting. You can use screws to hold the module in place. This helps you build a strong project and keeps your circuit neat. The small size and easy mounting make the l298n motor driver popular for robots and machines.
Callout: Always check the size of your motor driver before building. This helps you avoid problems fitting the module in your project.
You can use the l298n motor driver in many high voltage and high current projects. The wide voltage range and strong current support make it a good choice for motors in robots, vehicles, and machines. If you follow the details and use a clear diagram, you will build a safe and strong project.
L298N Dual H-Bridge Driver Working
H-Bridge Principle
You can use the l298n dual h-bridge driver to control two motors at the same time. The h-bridge circuit lets you change the direction of each motor by switching the voltage polarity. This means you can make your motor spin forward or backward. The l298n motor driver uses switches inside the h-bridge to change how current flows. When you flip the switches, the motor changes direction. You get forward and reverse motor control with this setup.
Here is a table that shows how the h-bridge principle works:
| Component | Function |
|---|---|
| H-Bridge Circuit | Allows for bidirectional control of DC motors by reversing voltage polarity. |
| Switches | Control the direction of current flow through the motor. |
| Motor | Rotates in either direction based on the polarity of the applied voltage. |
You can use the l298n motor driver for forward, reverse, and stop operations. The h-bridge design gives you full control over the direction of your motors.
Direction and Speed Control
You can set the direction of each motor using the IN1, IN2, IN3, and IN4 pins on the l298n dual h-bridge motor driver. When you send a signal to these pins, the driver changes the way current flows through the motor. This lets you choose if the motor spins left or right. You can also stop the motor by turning off both signals.
Speed control is easy with the l298n motor driver. You use the enable pins (ENA and ENB) to manage speed. When you send a pwm signal to these pins, you change how fast the motor spins. The pwm signal turns the motor on and off very quickly. The average power sent to the motor decides its speed. You can find a tutorial that shows how to use pwm for speed control.
Here is a list of what you can do with the l298n dual h-bridge driver:
-
Change direction of two motors
-
Stop motors when needed
-
Use pwm for speed control
-
Get smooth starts and stops
PWM and Enable Pins
The enable pins on the l298n motor driver play a big role in speed control. You send a pwm signal to ENA or ENB to set the speed for each motor. When the signal is high, the motor runs. When the signal is low, the motor stops. If you use a pwm signal, the motor speed matches the duty cycle of the signal.
| SIGNAL ON THE ENABLE PIN | MOTOR STATE |
|---|---|
| HIGH | Motor enabled |
| LOW | Motor not enabled |
| PWM | Motor enabled: speed proportional to the duty cycle |
You can use pwm to get precise speed control. The l298n dual h-bridge driver lets you adjust speed for both motors. You can make your robot move slowly or quickly. The pwm signal gives you full control over how your motors work.
Tip: Try different pwm values to see how your motor speed changes. This helps you learn the working principle of the l298n motor driver.
Interfacing L298N Motor Driver
Interfacing the l298n motor driver with your motors gives you full control over movement and speed. You can use this driver for DC motors, stepper motors, and connect it to microcontrollers like Arduino. Let’s look at how you can set up each type.
Connecting DC Motors
You can connect a DC motor to the l298n motor driver by following a few simple steps. This process helps you control direction and speed easily.
| Pin No | Pin Name | Type | Description |
|---|---|---|---|
| 1 | VCC | Power | Motor Driver power supply |
| 2 | GND | Power | Common ground |
| 3 | 5V | Power | Logic Circuit power supply |
| 4 | IN1 | Digital Input | Direction Control pin for Motor A |
| 5 | IN2 | Digital Input | Direction Control pin for Motor A |
| 8 | ENA | Digital Input [PWM] | Speed control pin for Motor A |
| 10 | OUT1 | Digital Output | Motor A Output terminal |
| 11 | OUT2 | Digital Output | Motor A Output terminal |
Follow these steps to connect your DC motor:
-
Connect the first DC motor to OUT1 and OUT2 of the l298n motor driver.
-
Use IN1 and IN2 to control direction:
-
Set IN1 HIGH and IN2 LOW for forward.
-
Set IN1 LOW and IN2 HIGH for backward.
-
Set both LOW to stop the motor.
-
-
Remove the jumper from ENA and connect it to a PWM-capable pin for speed control.
-
If you use a non-PWM pin for ENA, the motor will slow down gradually.
Tip: Try a simple arduino motor control tutorial to see these steps in action.
Connecting Stepper Motors
Interfacing a stepper motor with the l298n motor driver lets you control precise movements. You need to connect the motor phases and set up the power supply.
-
Connect the power supply to the l298n motor driver, matching the stepper motor’s voltage.
-
Supply 5V to the logic circuit by keeping the 5V-EN jumper in place.
-
Keep ENA and ENB jumpers in place to enable the motor.
-
Refer to your stepper motor datasheet for wire colors.
-
Connect A+ to OUT1, A- to OUT2, B+ to OUT3, and B- to OUT4.
-
Attach the positive terminal of your power supply to VS and the negative to GND.
-
Connect IN1, IN2, IN3, and IN4 to digital pins on your microcontroller.
Note: Always check the datasheet for your stepper motor before interfacing. This helps you avoid wiring mistakes.
Using with Microcontrollers
You can achieve advanced motor control by interfacing the l298n motor driver with microcontrollers. Arduino motor control projects often use this setup. You connect the driver’s input pins to GPIO pins on your microcontroller.
-
Use two GPIO pins for direction control.
-
Connect one PWM signal for speed control.
-
The TM4C123 microcontroller works well with the l298n motor driver.
-
Arduino, ESP32, and other boards also support interfacing the l298n.
-
For stepper motors, connect IN1, IN2, IN3, and IN4 to digital output pins.
Here is a sample Arduino code for controlling a DC motor:
digitalWrite(IN1, HIGH);
digitalWrite(IN2, LOW);
analogWrite(ENA, 128); // Set speed to half
Callout: Interfacing the l298n motor driver with microcontrollers lets you automate and customize motor control for your projects.
You can use the l298n motor driver for many types of motors. Interfacing gives you reliable control and flexibility. Try different setups to find what works best for your project.
Applications
The l298n motor driver lets you control motors in many ways. You can use it for robotics, automation, and DIY projects. Each area uses the driver to fix problems and make things easier.
Robotics
You can build robots that move or pick things up. The l298n motor driver helps you control robot motors. You can change how fast or which way each motor turns. This lets your robot turn, stop, or go backward. Many robots use the driver for wheels, arms, or sensors. You can follow a guide to connect the driver to your robot. The driver makes your robot smarter and more useful.
| Robotics Application | How the l298n motor driver helps |
|---|---|
| Mobile robots | Controls drive motors for movement |
| Robotic arms | Manages motors for lifting and grabbing |
| Sensor robots | Powers motors for sensor movement |
Tip: The l298n motor driver lets your robot move any way you want. Try changing the signals to see what your robot can do.
Automation
You can use the l298n motor driver in home or factory systems. The driver controls motors in belts, arms, and smart devices. You can make things like blinds or doors move by themselves. The driver lets you use sensors or timers to control motors. In factories, the driver helps motors work fast and right. You can also use it in electric vehicles to control speed.
-
Runs motors in electric bikes and scooters
-
Moves motors for belts and robot arms
-
Powers motors in robots for careful jobs
-
Opens blinds and doors in smart homes
-
Turns solar panels for better sunlight
Note: Automation needs good motor control. The l298n motor driver gives you smooth and steady control for many machines.
DIY Projects
You can use the l298n motor driver for your own home or school projects. Many students and hobbyists build cars, robots, or small machines. The driver helps you control motors for wheels, fans, or moving parts. You can make a remote car, a solar tracker, or a simple robot. The driver works with microcontrollers like Arduino, so you can write your own code. You can find a guide to help you start.
-
Build a robot car with motor control
-
Make a solar tracker that moves panels
-
Create a smart fan that changes speed
-
Design a machine that lifts objects
Callout: The l298n motor driver makes DIY projects fun and simple. You can learn to control motors and build cool things.
You can use the l298n motor driver in lots of projects. Robotics, automation, and DIY projects all need strong motor control. The driver helps you build smart and helpful devices.
L298N vs Other Motor Drivers
L298N vs L293D
If you compare the l298n motor driver to the L293D, you will see some big differences. The l298n motor driver gives your motors more power. It can control motors that use up to 2A for each channel. The L293D only supports 600mA per channel, so it is better for small motors. If you want to build a robot or machine with strong motors, pick the l298n motor driver.
| Feature | L293D | L298N |
|---|---|---|
| Voltage Range | 4.5V to 36V | 4.8V to 46V |
| Output Current | 600mA (650mA with EMF protection) | 2A per channel |
The l298n motor driver has a heatsink built in. This helps it stay cool when running motors for a long time. The L293D does not have a heatsink. You might need extra cooling if you use it with heavy loads.
| Feature | L298N | L293D |
|---|---|---|
| Thermal Dissipation | Has a built-in heatsink | Does not have a heatsink |
| Efficiency under load | Works better for long operations | May need extra cooling for heavy use |
| Cooling Requirements | Stays cooler with better heat control | Needs more cooling for big jobs |
You can use the l298n motor driver for bigger projects. Its wide voltage range lets you control motors in many robots and machines. You get more choices and easier power control. If you follow a guide, you will see how the l298n motor driver makes your project safer and stronger.
-
The l298n motor driver’s wide voltage range gives you more choices for different projects.
-
It makes power control easier for DIY robots and machines.
L298N vs Modern Alternatives
You might want to try newer motor drivers like the TB6612FNG. These drivers work better and use less power with low voltage motors. The TB6612 motor driver can be up to 95% efficient. It uses less power when not working. You get a lower voltage drop, so your motors run smoother and your battery lasts longer.
-
The TB6612 motor driver can reach 95% efficiency.
-
It uses less power when in standby mode.
-
It has a lower voltage drop, which helps low voltage motors.
The TB6612FNG is also smaller. You can use it in tiny projects or battery-powered devices. It works at lower voltages, so you can control small motors in little robots or gadgets. If you want to save space and energy, try these new drivers.
-
The TB6612FNG is more efficient than the l298n motor driver.
-
It works at lower voltages, which is good for small projects.
-
Its small size is great for battery-powered devices.
Think about cost and how easy it is to find. The l298n motor driver usually costs more because it works with bigger motors and higher current. You can find it in most electronics stores. The L293D is cheaper and good for budget projects. New drivers like the TB6612FNG may cost less and fit better in small devices.
| Motor Driver | Cost Comparison | Availability |
|---|---|---|
| L298N | Costs more because it works with big motors | Easy to find in electronics stores |
| L293D | Cheaper, good for budget projects | Also easy to find, best for small motors |
Pick the motor driver that fits your project by looking at power, efficiency, and size. The l298n motor driver is strong for big motors. New drivers help you save space and energy. Try different ones to see what works best for you.
You learned how the l298n motor driver controls motors in your projects. The table below shows its main features:
| Specification | Details |
|---|---|
| Motor controller | L298N, drives 2 DC motors |
| Operating Voltage | 5–35V |
| Max current | 2A per channel |
| Module size | 43 x 43 x 28 mm |
You connect motors to the motor terminals and use the extra terminals for power and logic. If you want to learn more, try these tutorials:
-
Learn to control two DC motors with Arduino and PWM.
-
Explore guides for 2-wheel and 4-wheel robot setups.
Mastering the l298n motor driver helps you build better robots and machines. You gain skills that make your electronics projects stronger and more reliable.

Written by Jack Elliott from AIChipLink.
AIChipLink, one of the fastest-growing global independent electronic components distributors in the world, offers millions of products from thousands of manufacturers, and many of our in-stock parts is available to ship same day.
We mainly source and distribute integrated circuit (IC) products of brands such as Broadcom, Microchip, Texas Instruments, Infineon, NXP, Analog Devices, Qualcomm, Intel, etc., which are widely used in communication & network, telecom, industrial control, new energy and automotive electronics.
Empowered by AI, Linked to the Future. Get started on AIChipLink.com and submit your RFQ online today!
Frequently Asked Questions
What motors can you control with the L298N motor driver?
You can control most DC motors and stepper motors with the L298N. The driver works best with motors that need up to 2A of current and use 5V to 35V.
Can you use the L298N motor driver with Arduino?
Yes, you can connect the L298N to an Arduino. Use digital pins for direction and PWM pins for speed. Many tutorials show you how to wire and code this setup.
Does the L298N motor driver need a heatsink?
The L298N motor driver comes with a built-in heatsink. This helps keep the chip cool when you run motors at higher currents. You should avoid touching the heatsink when the driver is working.
How do you power the L298N motor driver?
You connect the motor power supply (5V–35V) to the VCC terminal. The logic circuit uses 5V. You can use the onboard 5V regulator or supply 5V from your microcontroller.
Why does my motor not spin when using the L298N?
Check your wiring first. Make sure you connect the enable and input pins correctly. Also, confirm that your power supply matches the motor’s voltage and current needs.