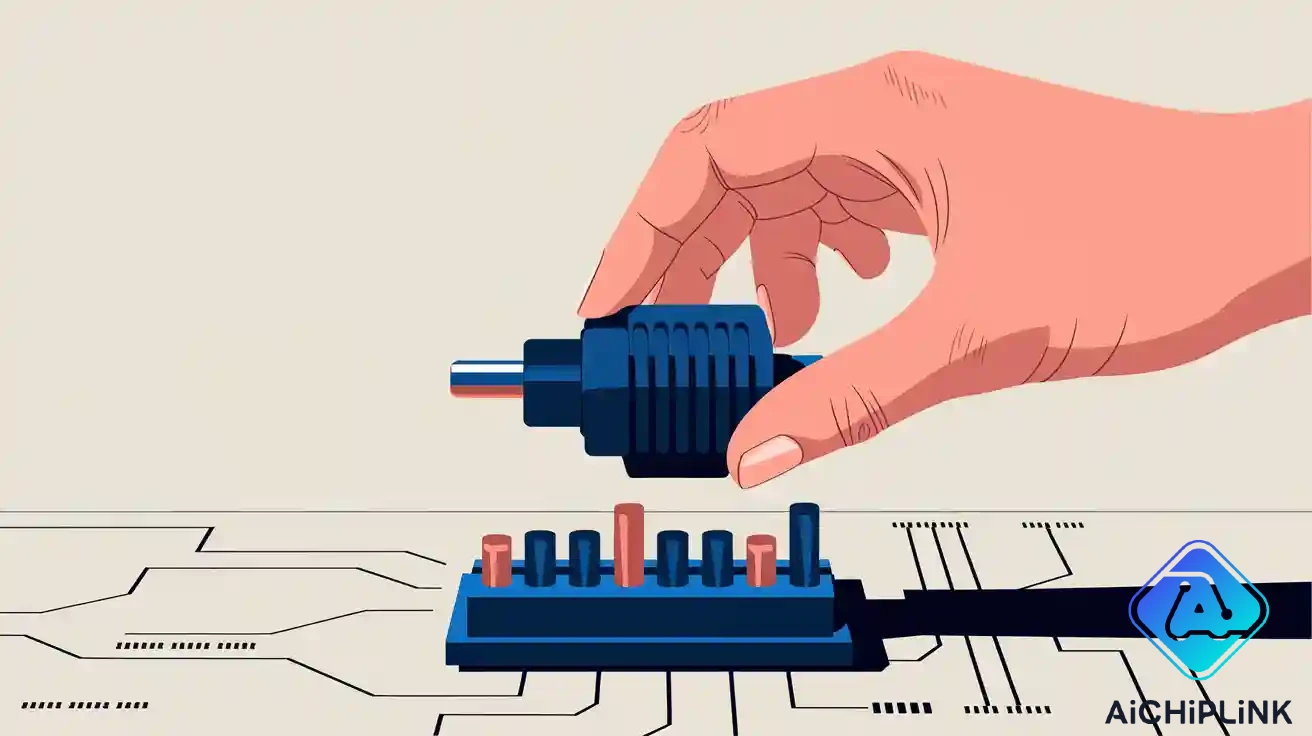
A potentiometer pinout helps you understand potentiometer connections by showing how the three pins are arranged. There are two fixed terminals and one wiper, and knowing which pin is which is crucial for connecting it correctly. This understanding prevents mistakes in your circuit. Potentiometers are important in electronics because they allow you to change volume, dim lights, or sense position. You can find them in devices like audio gear and joysticks. If you understand the potentiometer pinout, your circuit will function effectively. It is straightforward to learn how to find and wire the pins if you follow clear steps.
Tip: Most potentiometers have a simple design, so understanding the pins is easy.
Key Takeaways
-
Knowing potentiometer pinout is important for correct wiring. It helps stop mistakes that might break your circuit.
-
Always look at the datasheet for your potentiometer. This paper shows important details about pin layout and what each pin does.
-
Use a multimeter to find the wiper pin. This makes sure you wire it right and your circuit works well.
-
Try wiring potentiometers in different ways. This helps you get better and shows how they change voltage and resistance.
-
Watch out for common wiring mistakes. Check your connections before turning on your circuit to save time and avoid damage.
Understand Potentiometer Pinout
Potentiometer Pinout Basics
When you use a potentiometer, you must know the potentiometer pinout. This helps you connect it the right way in your circuit. A potentiometer has three pins. Two pins are fixed terminals. One pin is called the wiper. The fixed terminals are at each end of a resistive track inside the potentiometer. The wiper moves along this track. It changes the resistance between itself and the fixed terminals. This lets you control things like volume or brightness.
You can find different types of potentiometers in electronics. Here are some common types:
-
Rotary potentiometer: You see this type in audio equipment and lighting.
-
Linear potentiometer: This type is in audio mixers and machines.
-
Trimmer potentiometer: Makers use this type for tuning and calibration.
All these types have the same basic pinout. But their shapes and sizes can look different.
Pin Numbering and Layout
To learn potentiometer pinout, you should know how the pins are numbered and arranged. Most potentiometers have three pins in a row or sometimes in a triangle. The middle pin is usually the wiper. The two pins on the sides are the fixed terminals.
Here is a table that shows the usual pinout for a standard potentiometer:
| Pin No. | Pin Name | Description |
|---|---|---|
| 1 | Fixed End | Connected to one end of the resistive track |
| 2 | Variable End | Connected to the wiper, provides variable voltage |
| 3 | Fixed End | Connected to the other end of the resistive track |
The two fixed ends give a steady resistance. The wiper pin lets you pick any point along the resistive track. When you turn or slide the potentiometer, the wiper moves. This changes the output voltage.
Note: Always check the datasheet for your potentiometer. Some models may have a different pinout or layout.
Why Pinout Matters
You need to know potentiometer pinout because it changes how your circuit works. If you mix up the pins, the potentiometer may not work as you want. The two fixed terminals set the resistance range. The wiper changes the resistance and the voltage output. This lets you adjust things like sound or light.
Many beginners make mistakes with potentiometer pinout. Here are some common problems:
-
Potentiometer pinout confusion causes about 35% of beginner circuit failures.
-
Reversed wiper connections can make controls work backward or not work.
-
Shorting the power supply pins can break the potentiometer or other parts.
If you know potentiometer pinout, you can avoid these mistakes. You connect the right pins and get the control you want. Always check your pinout before wiring your potentiometer into a circuit.
Identifying Potentiometer Pins
Visual Identification
You can figure out potentiometer pins by looking at them. Most potentiometers have three pins. Hold a rotary potentiometer with the shaft facing you. The pins should point down. The left and right pins are the fixed terminals. The middle pin is the wiper. The wiper moves when you turn the knob. You can check this with a multimeter. Put one probe on the middle pin. Put the other probe on a side pin. Turn the shaft. If the resistance changes, you found the wiper.
Some potentiometers have pins in a triangle shape. The pin that sits alone is usually the wiper. The other two pins are the fixed terminals. You can look for small labels or numbers on the potentiometer. These can help you check the pin layout.
Tip: The wiper pin connects to the moving part. This could be the center of a rotary shaft or the slider on a linear potentiometer.
Using Datasheets
You should always look at the datasheet to be sure about the potentiometer pinout. Each potentiometer model has a datasheet from the maker. The datasheet shows a diagram or table with pin numbers and what they do. Here is a table you might see in a datasheet:
| Pin No. | Pin Name | Description |
|---|---|---|
| 1 | Fixed End | Connected to one end of the resistive track |
| 2 | Variable End | Connected to the wiper for variable voltage |
| 3 | Fixed End | Connected to the other end of the resistive track |
Trimmer potentiometers may use different names in their datasheets. But the idea is the same. Always match the pin numbers from the datasheet to the real pins before wiring.
Common Types
You will see many types of potentiometers in electronics. Each type has a similar pinout. The shape and size can be different. Here is a table with common potentiometer types and their uses:
| Type of Potentiometer | Description |
|---|---|
| Rotary Potentiometer | Used for volume controls in audio devices. You turn a shaft to change resistance. |
| Dual or Stereo Potentiometer | Controls two channels at once, often found in stereo equipment. |
| Linear or Slide Potentiometer | Uses a slider to adjust resistance, common in audio mixers. |
| Trimmer or Trimpot | Small, used for fine adjustments on circuit boards. |
| Digital Potentiometer | Changes resistance with digital signals, not by hand. |
No matter which potentiometer you pick, always check the pinout first. This step helps you avoid mistakes. It keeps your project working the right way.
Potentiometer Pin Functions in Circuit Design
Knowing what each potentiometer pin does is important. Each pin has its own job in the circuit. When you know their roles, you can control voltage and resistance easily.
Terminal 1
Terminal 1 is one of the two fixed ends. You connect this pin to your voltage source or ground. This depends on how your circuit is set up. Terminal 1 always stays at the same voltage. Turning or sliding the potentiometer does not change it. Inside the potentiometer, Terminal 1 is at one end of the resistive track. Connecting this pin sets where the voltage or resistance starts in your circuit.
Tip: Check which pin is Terminal 1 with a datasheet or multimeter. This helps you avoid mistakes when wiring.
Wiper
The wiper is usually the middle pin. It is the most important pin in the potentiometer. When you turn the knob or move the slider, the wiper moves too. It slides along the resistive track inside the potentiometer. This changes the resistance between the wiper and the fixed ends. The wiper lets you choose any spot between the two ends.
-
The wiper moves along the resistive part, so you can adjust resistance.
-
This movement changes the voltage output by changing resistance.
-
The output voltage depends on where the wiper is on the track.
You use the wiper to get different voltage outputs. That is why the wiper is so useful in circuits. When you connect the wiper, you can control things like volume or brightness. The wiper gives you smooth and easy control.
Terminal 3
Terminal 3 is the other fixed end. You connect this pin to the other side of your voltage source or ground. Like Terminal 1, Terminal 3 always stays at the same voltage. It is at the other end of the resistive track.
| Role of Terminal 3 | Description |
|---|---|
| Wiper | The third terminal, called the wiper, lets you change resistance. |
| Voltage Divider | It helps the potentiometer work as a voltage divider. |
| Resistance Control | Moving the wiper changes resistance and voltage output. |
Terminal 3 works with Terminal 1 to set the total resistance. When you move the wiper, you change the resistance between the wiper and each end. This is important for controlling voltage in your circuit.
Pin Functions and Circuit Operation
How you connect the pins changes how your circuit works. Terminal 1 and Terminal 3 set the total resistance. The wiper gives you a point that can change between them. If you use all three pins, the potentiometer acts as a voltage divider. The wiper then gives you a changing output voltage. This is common in things like audio controls and light dimmers.
If you use only two pins, the potentiometer acts as a variable resistor. This is good for changing current in your circuit.
Sometimes, people connect pins 2 and 3 together. This helps if dirt gets on the resistive track. It stops the resistance from going too high. This keeps some current flowing and helps your circuit stay steady. It also stops extra noise from getting into your circuit.
Note: Always check your potentiometer pinout before you wire it. The right pinout keeps your circuit working well.
When you know what each pin does, you can make circuits that work better. You avoid mistakes and get the control you want for your project.
Wiring a Potentiometer
Voltage Divider
A potentiometer can work as a voltage divider in circuits. This setup lets you change the output voltage by turning the knob. To do this, connect the two outer terminals to your voltage source. The input voltage goes across the whole potentiometer. The middle terminal, called the wiper, gives you the output voltage. When you turn the knob, the output voltage goes from zero up to the input voltage. This method is good for changing things like audio volume or light brightness. Many wiring examples use this divider setup because it gives smooth control.
Variable Resistor
A potentiometer can also be used as a variable resistor. For this, you only need two terminals. Connect one outer terminal to your circuit. Connect the wiper to another point in your circuit. You can leave the unused outer terminal unconnected or tie it to the wiper for better results. This wiring changes the resistance in your circuit when you turn the knob. The table below shows how voltage divider and variable resistor wiring are different:
| Configuration Type | Description |
|---|---|
| Variable Resistor | Connect one end and the wiper. The other end can be left open or joined to the wiper. |
| Voltage Divider | Connect both ends to the voltage source. Take output from the wiper for adjustable voltage. |
You will find many examples using both divider and variable resistor setups.
Step-by-Step Wiring
Here are steps for safe and correct potentiometer wiring:
-
Put the potentiometer on a flat surface with the three terminals facing you.
-
Find the terminals: left is terminal 1, middle is the wiper, right is terminal 3.
-
Strip the wires you will use.
-
Connect terminal 1 to ground in your circuit.
-
Connect terminal 3 to the input voltage.
-
Connect the wiper (middle terminal) to your output.
-
Test the wiring with a voltmeter.
-
Turn the shaft to see the voltage change at the output.
-
Add a knob if you want easier control.
Always connect the wiper to the output. This step lets you control the output voltage with the potentiometer. It also keeps your circuit working if the wiper fails. Good wiring helps your circuit run well and gives you full control.
Tip: Try both voltage divider and variable resistor wiring examples to see how each affects your circuit.
Troubleshooting and Best Practices
Common Mistakes
When you use potentiometer pinout in circuits, mistakes can happen. These mistakes might make your circuit not work or act weird. Always check your wiring and pinout before turning on your circuit. The table below lists some common wiring mistakes and how to fix them:
| Symptom | Possible Causes | Recommended Fixes |
|---|---|---|
| Erratic or Jumping Output | Loose wiring, bad solder, or dirty wiper | Reflow solder, clean with contact cleaner |
| No Output / Only Full or Zero Output | Broken or miswired pin, wiper shorted/open | Check all three pins, fix connections |
| Output Stuck at Half (or Fixed Value) | Wiper or ground disconnected | Fix wiper and ground wiring |
| Crackling / Scratchy Noise (Audio) | Dirty or worn tracks, grounding issues | Clean potentiometer, add shielding |
| Stereo Channel Mismatch | Pot resistance mismatch | Use matched potentiometers |
| Mechanical Issues | Loose shaft, wrong component | Replace or verify part type |
Tip: Always look at your datasheet and check your wiring before finishing your project.
Troubleshooting Pinout Issues
If your potentiometer does not work right, you can try these steps to find and fix pinout problems: First, look at the potentiometer pins. Most have three pins in a row, and the middle one is the wiper. Next, check for diagrams or labels on the potentiometer or its box. These often show the pinout. Then, use a multimeter to measure resistance between the pins. This helps you find the two fixed ends of the resistive track. Turn the shaft and watch if the resistance changes. This shows you which pin is the wiper. Compare what you find with the datasheet to make sure your wiring is correct. Make sure your PCB or breadboard matches your circuit diagram. Look at solder joints and check for broken traces or loose wires.
Note: The datasheet is very helpful for checking pinout and wiring. It gives you details about the potentiometer and helps you avoid mistakes.
Choosing the Right Potentiometer
Picking a potentiometer for your circuit depends on what you need. Think about the type, resistance value, and where you will use it. Linear potentiometers give smooth control, which is good for audio. Rotary potentiometers are great for lights or mixers. Digital potentiometers are best if you want to use microcontrollers.
You should also think about things like temperature and dust. High heat can change how the potentiometer works. Dust and water can hurt the pinout and make the potentiometer not last as long. If your circuit will be in tough places, look for sealed potentiometers.
Always read the datasheet before picking a potentiometer. The datasheet tells you about pinout, resistance, and special features. This helps you pick the right one for your circuit and wire it correctly.
Remember: Good design starts with the right datasheet and careful wiring. This keeps your circuit working well and makes fixing problems easier.
You can learn potentiometer pinout by taking a few simple steps. First, use a multimeter or tester to find each pin. Always look at the datasheet. It tells you how the potentiometer works and how to wire it. Practice wiring often. This helps you fix problems and feel more sure. Good wiring lets the potentiometer control your circuit well. If you want to learn more, read guides about potentiometer wiring, circuit symbols, and adjustable circuits.
Remember: The middle pin is usually the wiper. The wiper changes resistance and output.
-
Practice wiring potentiometers to get better at it.
-
Always check the datasheet for every potentiometer you use.
-
Try out different potentiometer types to see how they change your circuit.

Written by Jack Elliott from AIChipLink.
AIChipLink, one of the fastest-growing global independent electronic components distributors in the world, offers millions of products from thousands of manufacturers, and many of our in-stock parts is available to ship same day.
We mainly source and distribute integrated circuit (IC) products of brands such as Broadcom, Microchip, Texas Instruments, Infineon, NXP, Analog Devices, Qualcomm, Intel, etc., which are widely used in communication & network, telecom, industrial control, new energy and automotive electronics.
Empowered by AI, Linked to the Future. Get started on AIChipLink.com and submit your RFQ online today!
Frequently Asked Questions
What does a potentiometer do in a circuit?
A potentiometer helps you change voltage or resistance. You can use it to control things like sound, light, or speed. When you turn the knob or move the slider, the output changes.
How do you find the wiper pin on a potentiometer?
You can use a multimeter to help. Put one probe on the middle pin and the other on a side pin. Turn the potentiometer. If the resistance goes up or down, you found the wiper.
Can you use a potentiometer as a switch?
No, a potentiometer cannot work as a switch. It only changes resistance or voltage. It does not open or close the circuit. You need a different part if you want a switch.
Why does my potentiometer not work as expected?
Make sure your wiring is correct and the pins are in the right spots. If you mix up the wiper and the fixed ends, the potentiometer might not change the output the way you want.