The PC817 IC optocoupler provides reliable general electrical isolation between circuits, and understanding the PC817 pinout is essential for proper implementation. This device combines an infrared LED and a phototransistor inside a single package. When the LED receives a signal, it activates the phototransistor, transferring data while blocking direct electrical contact. The PC817 optocoupler protects sensitive electronics from voltage spikes and noise. With a collector-emitter voltage up to 80V, isolation voltage of 5000 Vrms, and fast 18μs response times, the PC817 suits microcontroller and AC load control tasks. The following table summarizes key PC817 optocoupler specifications and pinout details:
| Specification | Value |
|---|---|
| Number of Pins | 4 |
| Collector-Emitter Breakdown Voltage | 80V |
| Current Transfer Ratio | 50%–600% |
| Input Forward Voltage | ~1.2V |
| Isolation Voltage | 5000 Vrms |
Key Takeaways
-
The PC817 optocoupler safely isolates two circuits by using an internal LED and phototransistor to transfer signals without direct electrical contact.
-
It has four pins: two for the LED input (anode and cathode) and two for the phototransistor output (collector and emitter), each with a specific role.
-
The device supports up to 80V collector-emitter voltage and provides isolation up to 5000 Vrms, protecting sensitive electronics from voltage spikes and noise.
-
Use a current-limiting resistor to keep LED current below 50mA and never connect input and output grounds together to maintain proper isolation.
-
The PC817 works well in microcontroller projects and AC load control, making it ideal for Arduino interfaces and switching relays or TRIACs safely.
PC817 Pinout
Pinout Diagram
The PC817 pinout shows four pins arranged in a single row. Each pin has a specific role in the operation of the optocoupler. The following pin configuration diagram helps identify each connection:
      _________
     |         |
  1--|●      4 |-- Collector (Phototransistor)
  2--|        3|-- Emitter (Phototransistor)
     |_________|

  1: Anode (LED)
  2: Cathode (LED)
  3: Emitter (Phototransistor)
  4: Collector (Phototransistor)
The table below summarizes the PC817 pinout and pin configuration:
| Pin Number | Pin Name | Description |
|---|---|---|
| 1 | Anode | Anode pin of the internal IR LED, serves as the logical input signal. |
| 2 | Cathode | Cathode pin of the IR LED, connected to common ground with circuit and power. |
| 3 | Emitter | Emitter pin of the phototransistor, connected to ground. |
| 4 | Collector | Collector pin of the phototransistor, provides logical output. |
This pin configuration diagram matches the standard PC817 pinout found in datasheets and technical documents.
Pin Functions
Each pin in the PC817 optocoupler has a unique function that enables safe and effective electrical isolation between circuits. The optocoupler uses an internal infrared LED and a phototransistor to transfer signals without direct electrical contact.
-
Pin 1 (Anode): This pin connects to the positive side of the input signal. When voltage is applied, current flows through the LED, causing it to emit infrared light.
-
Pin 2 (Cathode): This pin connects to ground. It completes the circuit for the LED, allowing it to operate when a signal is present.
-
Pin 3 (Emitter): This pin connects to the ground side of the output circuit. It serves as the output reference for the phototransistor.
-
Pin 4 (Collector): This pin provides the logical output. When the LED inside the PC817 optocoupler emits light, the phototransistor activates, allowing current to flow from collector to emitter.
The PC817 pinout ensures that the input and output sides remain electrically isolated. The LED and phototransistor sit inside the same package but do not share any direct electrical connection. The optocoupler achieves isolation up to 5000 Vrms, which protects sensitive microcontroller circuits from high voltages or noise on the output side.
Measured performance indicators confirm the accuracy of each pin's function. The input side (pins 1 and 2) requires a forward voltage of about 1.2 to 1.25V and can handle up to 50mA. The output side (pins 3 and 4) supports a maximum collector-emitter voltage of 80V and a collector current up to 50mA. The current transfer ratio, typically above 50% at 5mA input, shows efficient signal transfer from the LED to the phototransistor. The optocoupler switches quickly, with rise and fall times around 18 microseconds, making it suitable for fast digital signals.
Tip: Always double-check the PC817 pinout before connecting the device in a circuit. Incorrect wiring can damage the optocoupler or connected components.
The PC817 pinout and pin configuration make this optocoupler a reliable choice for isolating microcontroller inputs, switching AC loads, and protecting low-voltage circuits from electrical hazards.
PC817 Datasheet
Specifications
The pc817 datasheet provides detailed information about the electrical characteristics of the device. Engineers and students often refer to these specifications when designing circuits that require isolation. The pc817 optocoupler uses an internal infrared LED and a phototransistor to transfer signals safely between two circuits.
The following table summarizes the most important parameters found in the pc817 datasheet:
| Parameter | Specification |
|---|---|
| Forward Voltage (Vf) (typical) | 1.2 V |
| Maximum Collector-Emitter Voltage (VCEO) | 80 V |
| Maximum Collector Current (IC) | 50 mA |
| Cutoff Frequency | 80 kHz |
| Rise Time | 18 μs |
| Fall Time | 18 μs |
| Collector-Emitter Saturation Voltage | 0.1 V to 0.2 V |
| Maximum Emitter-Collector Voltage (VEBO) | 6 V |
| Maximum Power Dissipation | 200 mW |
| Operating Temperature Range | -30°C to 100°C |
| Storage Temperature Range | -55°C to 120°C |
| Current Transfer Ratio (Min) | 50% @ 5 mA |
| Current Transfer Ratio (Max) | 600% @ 5 mA |
| Isolation Voltage Between Input and Output | 5,000 Vrms |
| Internal Resistance | 100 Ω |
These values help users select the right optocoupler for their projects. The pc817 datasheet also highlights the fast response times and high isolation voltage, making the pc817 suitable for both digital and analog applications.
Note: Always check the current transfer ratio (CTR) when choosing an optocoupler. The CTR shows how efficiently the input current transfers to the output side.
Absolute Ratings
Absolute maximum ratings define the limits that the pc817 can handle without damage. Exceeding these values may cause permanent failure. The pc817 datasheet lists these ratings to ensure safe operation.
-
Maximum Collector-Emitter Voltage (VCEO): 80 V
-
Maximum Emitter-Collector Voltage (VEBO): 6 V
-
Maximum Collector Current (IC): 50 mA
-
Maximum Power Dissipation: 200 mW
-
Input Forward Current (IF): 50 mA
-
Reverse Input Voltage: 6 V
-
Isolation Voltage (Input to Output): 5,000 Vrms
-
Operating Temperature Range: -30°C to 100°C
-
Storage Temperature Range: -55°C to 120°C
The optocoupler must operate within these limits to maintain reliability. The pc817 datasheet recommends keeping the device well below these maximums for long-term use.
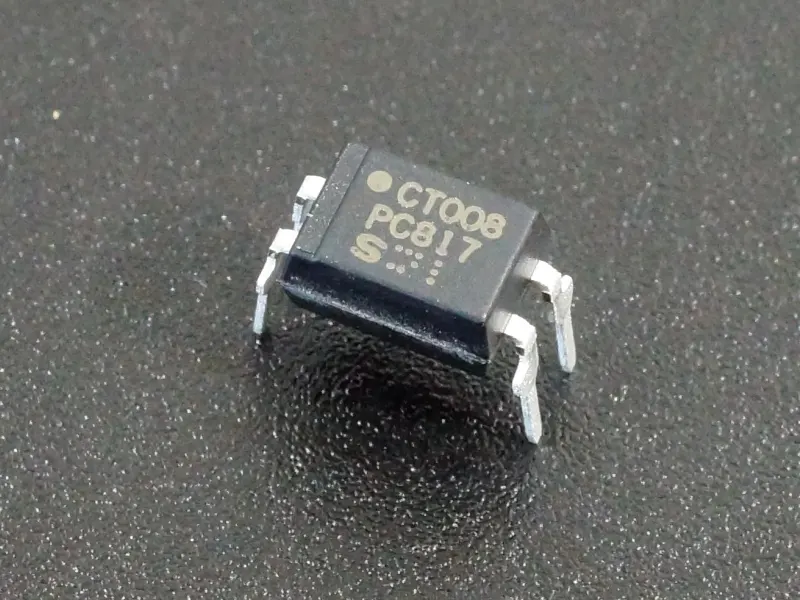
2D Package
The pc817 comes in a compact 4-pin DIP (Dual Inline Package). This package allows easy mounting on standard breadboards and PCBs. The 2D package drawing in the pc817 datasheet shows the physical dimensions, which help with layout and design.
Typical package dimensions include:
-
Body width: 6.5 mm
-
Body length: 7.0 mm
-
Pin pitch: 2.54 mm (standard DIP spacing)
-
Pin length: 3.5 mm
      _________
     |         |
  1--|●      4 |-- 7.0 mm
  2--|        3|--
     |_________|
      6.5 mm
The small size of the pc817 optocoupler makes it ideal for compact circuit designs. The DIP package also provides good mechanical stability and easy soldering.
Tip: Always refer to the pc817 datasheet for the exact package outline before designing a PCB footprint.
The pc817 datasheet serves as a valuable resource for anyone working with optocouplers. It provides all the necessary details for safe and effective use of the pc817 in a wide range of electronic projects.
How PC817 Works
Working Principle
The pc817 optocoupler uses an internal infrared LED and a phototransistor to achieve electrical isolation between two circuits. When the input voltage remains below 1.25V, the LED stays off. In this state, the phototransistor does not conduct, and a pull-up resistor on the collector keeps the output voltage high. Once the input voltage reaches or exceeds 1.25V, the LED emits infrared light. This light activates the phototransistor, causing it to conduct and pull the output voltage down to zero. The device responds quickly, with rise and fall times of about 18 microseconds. This behavior allows the optocoupler to transmit digital signals while keeping the input and output electrically separated. The pc817 provides reliable isolation, making it suitable for protecting sensitive microcontroller circuits.
Basic Circuit
A simple circuit demonstrates how to use pc817 ic for signal isolation. The setup includes a 9V battery, a 10K resistor, and a switch to control the LED inside the pc817. The phototransistor side connects to a 1K pull-up resistor and the output load. When the switch closes, current flows through the LED, which increases its brightness and activates the phototransistor. The phototransistor then conducts, pulling the output voltage low. The table below summarizes the main aspects of this basic circuit:
| Aspect | Details |
|---|---|
| LED Current | Keep below 50mA; 20-30mA recommended |
| Pull-up Resistor | 1KΩ on collector side |
| Logic Operation | Input low: output high; Input high (≥1.25V): output low |
| Isolation | Input and output grounds remain unconnected |
| Switching Speed | Rise/fall times ~18μs |
This basic circuit shows the pc817 optocoupler converting an electrical input into an optical signal and then back to an electrical output, all while maintaining isolation.
Safe Usage
To ensure safe operation of the optocoupler, users should follow several important guidelines:
-
Use a current-limiting resistor with the LED to keep current below 50mA, ideally between 20-30mA.
-
Maintain the operating temperature between -30°C and 100°C to prevent thermal stress.
-
Never connect the input and output grounds together, as this would defeat the isolation.
-
In microcontroller applications, use 220Ω resistors to limit current on both the LED and phototransistor sides.
-
Always check the maximum ratings in the datasheet before designing a circuit.
-
The pc817 optocoupler responds quickly, so it works well in fast-switching applications.
Tip: Careful attention to resistor values and temperature limits helps extend the life of the pc817 and ensures reliable isolation.
These practices help users get the best performance from the pc817 and avoid common mistakes when learning how to use pc817 ic in real-world circuits.
PC817 Equivalents
Alternative Optocouplers
Many engineers look for alternatives to the pc817 optocoupler when designing circuits that need electrical isolation. Several optocoupler models offer similar features and can replace the pc817 in most applications. Some of the most common alternatives include:
-
4N35: This optocoupler provides a phototransistor output with an extra base pin. It offers higher current gain and works well in circuits that need more sensitivity.
-
4N25: This device is similar to the 4N35 but has a lower current gain. It remains a popular choice for general isolation tasks.
-
TLP521: Toshiba’s TLP521 matches the pc817 in many specifications and comes in a standard DIP package.
-
H11AA1: This optocoupler uses a phototransistor output and works well for AC signal detection.
-
MOC3021: This device uses a photo-triac output, making it suitable for switching AC loads.
Note: The 4N35 and 4N25 both come in DIP and SMD packages, which gives designers flexibility during installation. The 4N35 also includes a base output, allowing higher gain switching compared to the pc817 optocoupler.
Comparison Table
The table below compares the pc817, 4N25, and 4N35 optocouplers. It highlights key differences in output type, package, and performance.
| Parameter | PC817 | 4N25 | 4N35 |
|---|---|---|---|
| Forward Voltage (LED) | 1.25 V | N/A | N/A |
| Max Collector-Emitter Voltage | 80 V | N/A | N/A |
| Max Collector Current | 50 mA | N/A | N/A |
| Response Time | 18 microseconds | Moderate | Higher gain, no exact time |
| Cut-off Frequency | 80 kHz | N/A | N/A |
| Isolation Voltage | Up to 5000 V | Moderate | N/A |
| Operating Temperature Range | -30°C to +100°C | N/A | N/A |
| Internal Resistance | 100 ohms | N/A | N/A |
| Max Power Consumption | 200 mW | N/A | N/A |
| Package Type | 4-pin DIP | 6-pin DIP/SMD | 6-pin DIP/SMD |
| Output Type | Photo-transistor | Photo-transistor | Photo-transistor with base output |
The pc817 optocoupler works best in DC circuits and offers a simple photo-transistor output. The 4N35, with its base output, allows for higher gain switching and can handle more sensitive input signals. The 4N25 provides a basic phototransistor output and remains a reliable choice for many isolation needs. Designers should select the optocoupler that matches their circuit requirements for voltage, current, and package type.
PC817 IC Optocoupler Applications
Arduino Interface
Many students and engineers use the pc817 ic optocoupler to connect Arduino boards with high-voltage circuits. The pc817 isolates the low-voltage microcontroller from dangerous AC signals. In a common project, the pc817 detects the zero-crossing point of a 220V AC line. The optocoupler converts noisy AC pulses into clean digital signals. These signals go to an Arduino interrupt pin. The Arduino sketch then uses these pulses to control a TRIAC for dimming a lamp. This setup keeps the Arduino safe from voltage spikes and electrical noise. The pc817 ic optocoupler makes home automation and IoT projects safer and more reliable.
Sample Arduino Zero-Cross Detection Circuit:
AC Line --[Resistor]--|>|--[PC817]--GND
                          |
                      Arduino Pin (Interrupt)
The pc817 ic optocoupler ensures that the Arduino only receives safe, isolated signals.
AC Load Control
The pc817 ic optocoupler also works well for switching AC loads. In this application, the optocoupler controls a relay or a TRIAC. The microcontroller sends a signal to the pc817 input. The output side then triggers the relay or TRIAC, which switches the AC load on or off. This method keeps the control circuit and the high-voltage load completely separate. Many industrial and home automation systems use this approach to protect sensitive electronics.
Typical AC Load Switching Table:
| Component | Function |
|---|---|
| PC817 | Signal isolation |
| Relay or TRIAC | Switches AC load |
| Microcontroller | Sends control signal |
Always use proper insulation and safety measures when working with AC circuits.
Download Datasheet
Anyone who wants to learn more about the pc817 ic optocoupler should review the official datasheet. The pc817 datasheet pdf contains detailed specifications, pin diagrams, and application notes. This document helps users design safe and effective circuits. For more information, search for "pc817 datasheet pdf" from trusted semiconductor manufacturers.
The pc817 datasheet pdf is a valuable resource for understanding all applications of pc817 optocoupler.
The PC817 optocoupler stands out for its reliable isolation and versatility in electronics. Its specifications support a wide range of uses, from microcontroller interfacing to AC load control.
| Specification | Value/Range |
|---|---|
| Forward Voltage | 1.25 V |
| Max Collector Current | 50 mA |
| Collector-Emitter Voltage | 80 V |
| Rise/Fall Time | 18 µs |
| Isolation Protection | Up to 5 kV |
Understanding each pin’s function and safe operation helps prevent circuit damage. Designers often choose the PC817 for its robust performance and reliability. Reviewing the datasheet ensures proper application in any project.
FAQ
What is the main purpose of the PC817 optocoupler?
The PC817 optocoupler isolates two circuits. It transfers signals using light inside the chip. This protects sensitive parts from high voltage or electrical noise.
Can the PC817 control AC loads directly?
The PC817 cannot switch AC loads directly. It controls a relay or TRIAC, which then switches the AC load. This method keeps the control circuit safe.
How much voltage can the PC817 handle between input and output?
The PC817 provides isolation up to 5,000 Vrms between input and output. This high isolation protects microcontrollers and low-voltage circuits from dangerous voltages.
Is the PC817 suitable for Arduino projects?
Yes, the PC817 works well with Arduino. It safely connects the Arduino to high-voltage or noisy circuits. Many students use it for zero-cross detection and relay control.
What are some common alternatives to the PC817?
Common alternatives include the 4N35, 4N25, and TLP521 optocouplers. These devices offer similar features. Designers choose them based on current, voltage, and package needs.
Written by Jack from AIChipLink.
AIChipLink, one of the fastest-growing global independent electronic components distributors in the world, offers millions of products from thousands of manufacturers, and many of our in-stock parts is available to ship same day.
We mainly source and distribute integrated circuit (IC) products of brands such as Broadcom, Microchip, Texas Instruments, Infineon, NXP, Analog Devices, Qualcomm, Intel, etc., which are widely used in communication & network, telecom, industrial control, new energy and automotive electronics.
Empowered by AI, Linked to the Future. Get started on AIChipLink.com and submit your RFQ online today!


